Some authors may wish to include tables and graphs in their abstracts as its a great way to show results and findings. Unfortunately, the abstract text boxes doesn't support tables very well as they don't hold their formatting and structure.
Instead, if you want to include a table with your abstract, you will need to attach it as an image. This guide will show you how to convert a table in MS Word to an image that can be uploaded.
Step 1) Create your table
First of all, create the table that you want in Microsoft Word.

Step 2) Copy your table to the clipboard
Now, double-click to select your table. Right click on it and select 'Copy'.
Step 3) Open your table in MS Paint
Open your Start Menu. The start button is usually located in the bottom left hand corner of the screen. Then use the search bar and type in " paint" or click on the paint option in your menu

When you open Microsoft Paint. It'll look like this:

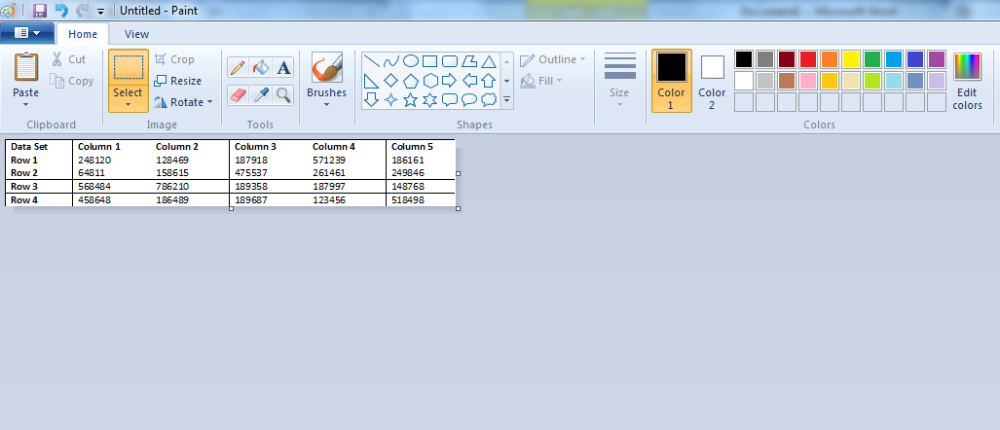
Insert your copied table into Paint by right-clicking and selecting 'Paste' or by clicking on the "Paste" option on the clipboard in the top-left corner.. You can use the 'Select' tool to drag a box around the table and then select 'crop' to tidy up your image. It should now look something like this :

Step 4) Save your finished image
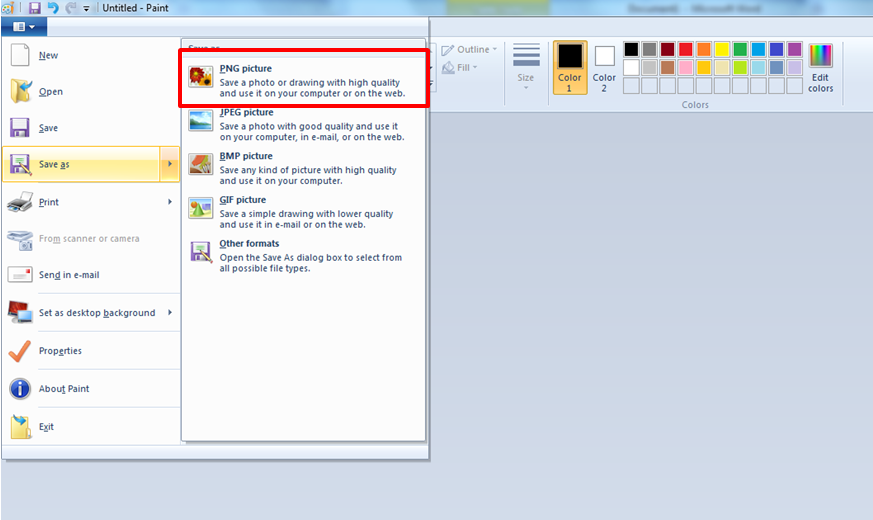
To finish up, click 'File' in the top-right corner and select 'Save As' to save your image as a .png file. Now you can go on and upload your table!

Step 5) Load the image to your abstract
Click the 'Attach Image' button to open the dialogue which allows you to select and upload your image. Then go to where you saved your table, click on it and it will upload. And that's it, you're done!
