Once you have collected content from your Authors you will need to schedule these Presentations into Sessions.
Within Ex Ordo Virtual, you can create these sessions directly from the Virtual hub in the Builder.
The Virtual Builder can be accessed from the Ex Ordo dashboard via the navigation bar.

Step 1) Navigate to the Virtual Hub
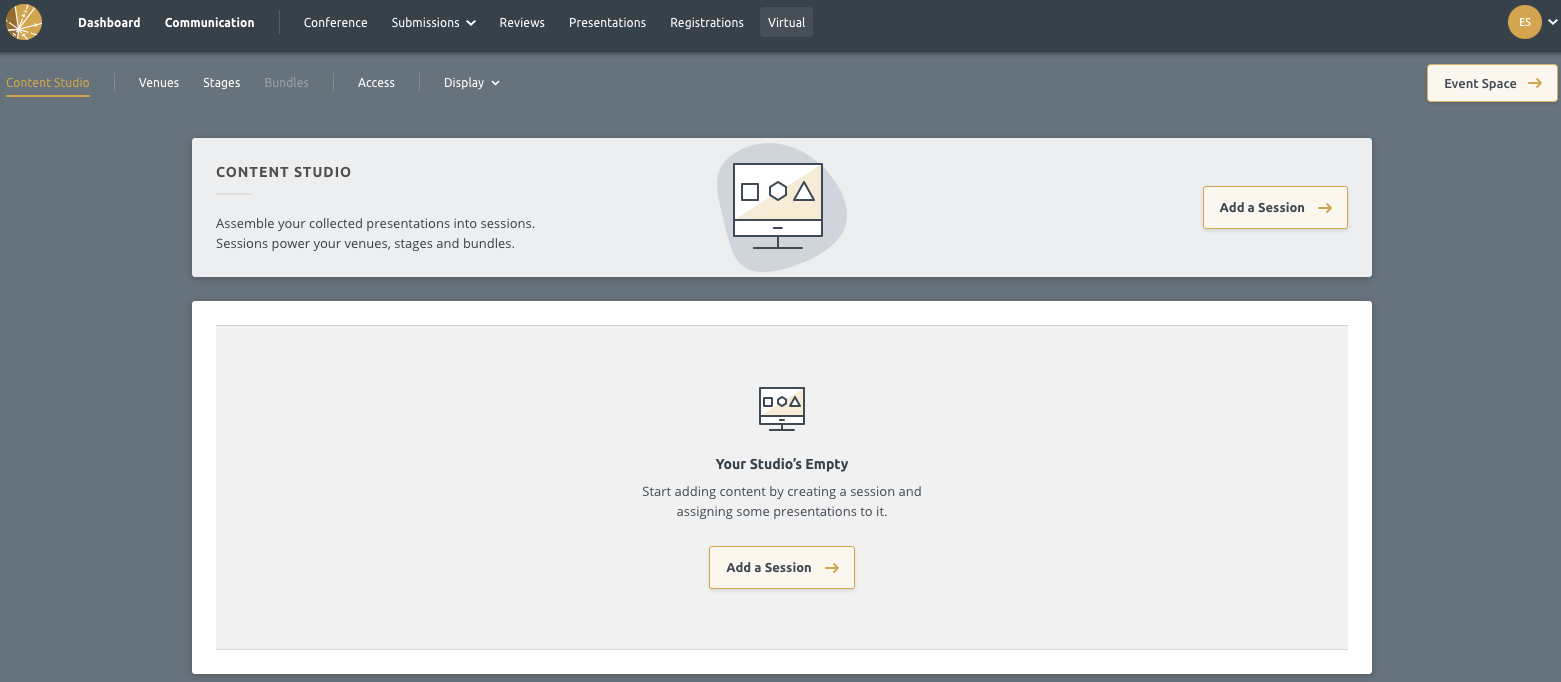
Upon clicking the Builder under Virtual on the navigation bar, you will be brought directly to the Content Studio. This is where you will create all the different Sessions for your conference.

Step 2) Add a Session
To create a session, you begin by clicking the Add a Session button.
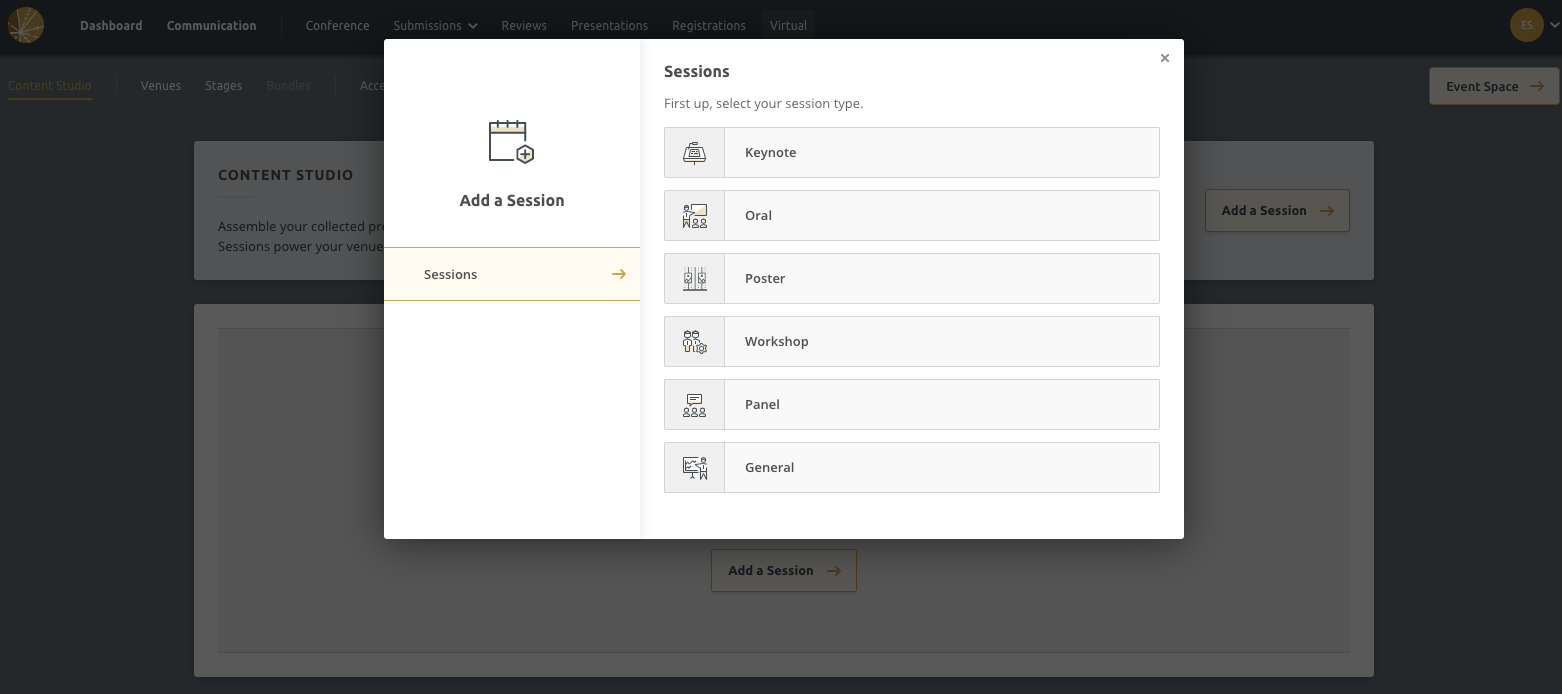
You will then be presented with the screen below:

There are six Session Types to choose from: Keynote, Oral, Poster, Workshop, Panel and Other
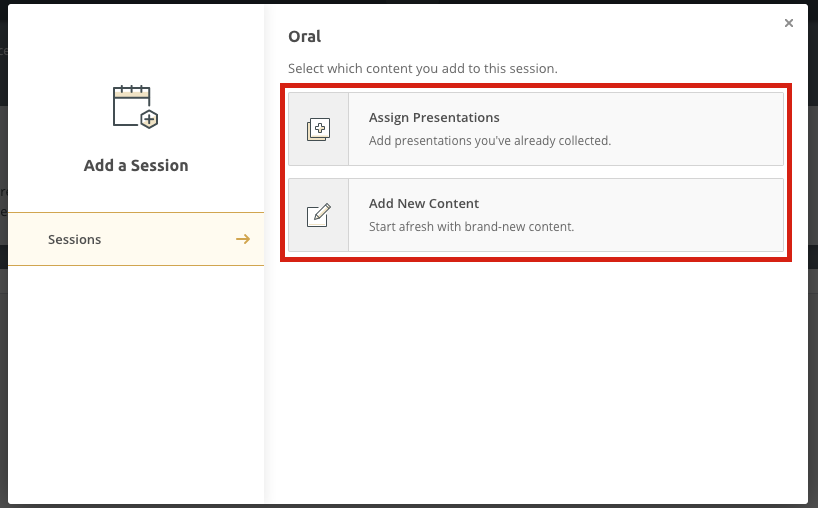
Once you decide on your Session Type, there are two options to choose from on how you will add content to the Session:
- Assign Presentations - This option allows you to assign presentations you’ve already collected and accepted in Ex Ordo.
- Add New Content - This option allows you to manually add content to the session. It’s useful for adding details of presentations you have not already collected in the system (like a Keynote).

If you select Assign Presentations, the next window will open and you can navigate through to create the session: Add Session Title, Description, Shortcode.

To add Session Organisers, enter their email address into the field (they will not be notified when added here).

It’s also possible to upload a video to a Session. Check out this article for more information: How to upload video content to a session
Step 3) Add Presentation to Session
Next, to add Presentations to this Session, click Presentations and you will see the screen below.

On the right side of your page, you will see a list of all your Accepted Presentations. You can filter this list by Tracks (if turned on), Decision, and Topics. Under More Filters, you can get granular.
To add a Presentation to the Session, you simply hover over it and click Add to Session.

If you selected Add New Content as opposed to Assign Presentation, instead of Presentation on the left side, you will see Content (see image below). Here you can manually enter in all the presentation information including the Presentation Title, Summary, Presenters Name, Affiliation, and Biography.

To exit this Session screen, you can click outside of it to save and exit.
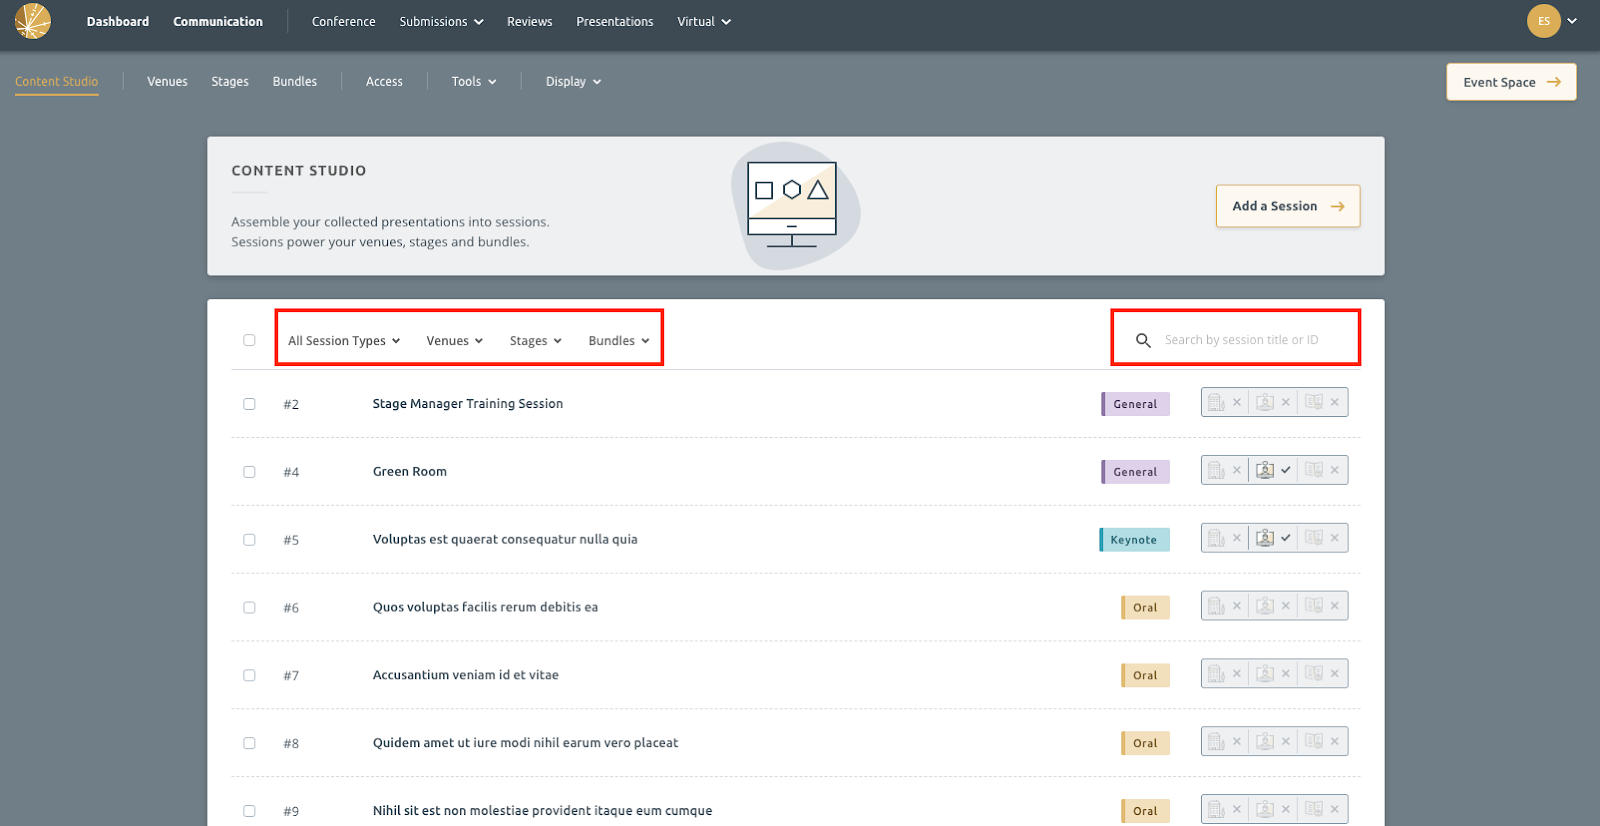
As you create Sessions, they will all appear in your Content Studio.
Filtering the Content Studio
The Content Studio has filters to make navigating and searching through your content easier. You can filter by Session Type, Venue, Stages, Bundles and Conference Days.
There is also a search bar on the right side where you can search by Session ID, Session title, Session Chair, Presentation Title, Presentation ID and Presenting Author.

Emailing from the Content Studio
You can email your presenters and session organisers directly from the content studio.
Simply select one or all submissions (you can select all by clicking the box to the left of the filters) and then click either Message Presenters or Message Session Organisers.

