Venues are used to schedule sessions in the following circumstances:
- The sessions are in-person and will not be streamed online.
- You have the mobile app. All sessions must be assigned to a venue to sync to the mobile app.
This article details how to create Venues.
Step 1: Navigate to the Venues Page
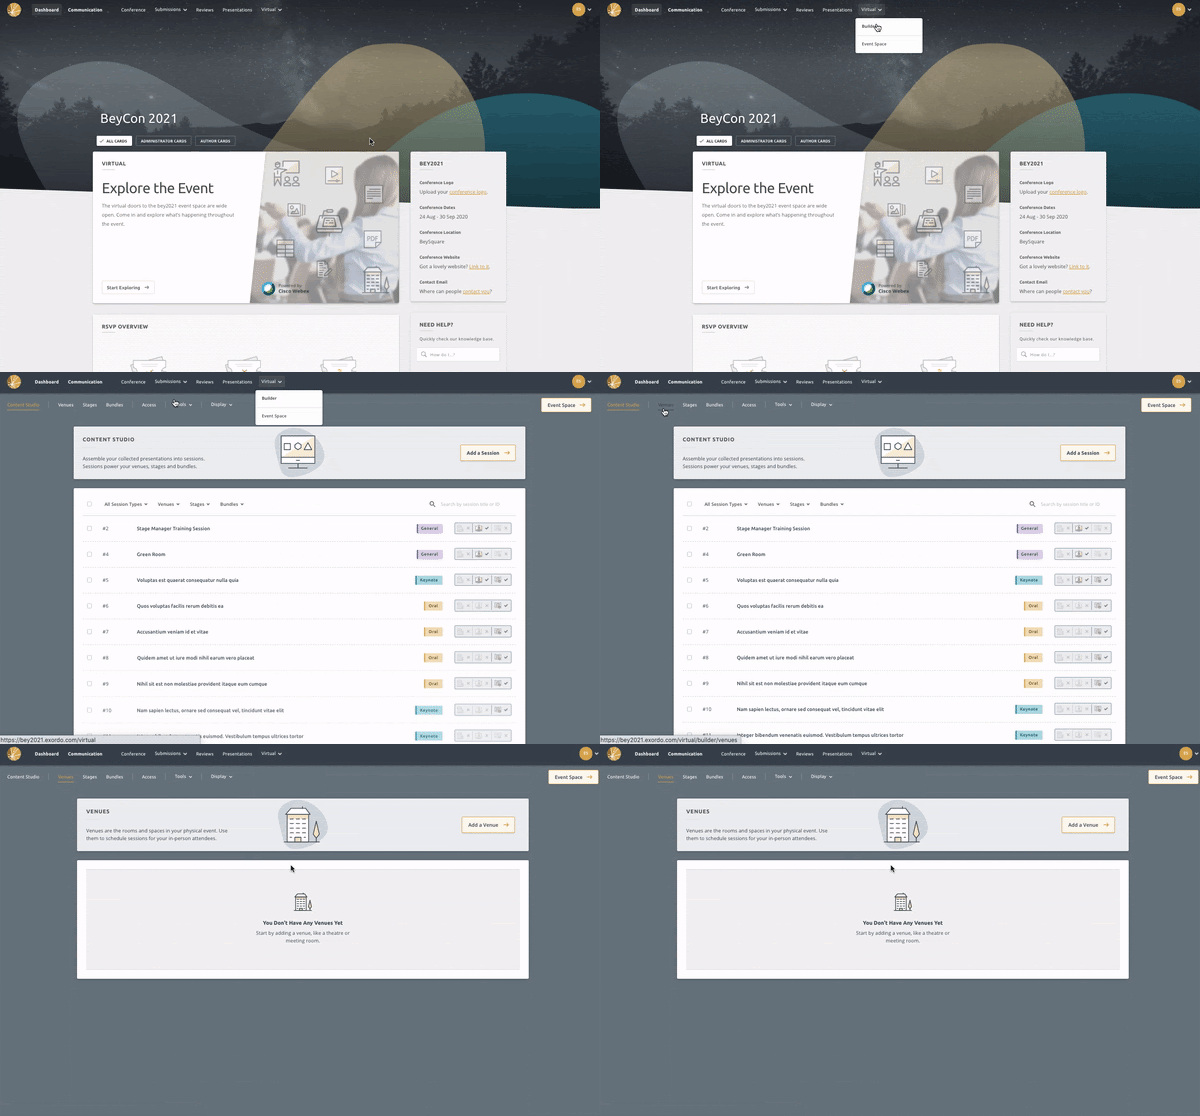
Navigate to the Virtual Builder and click on the Venues tab.
.

Step 2: Add a Venue
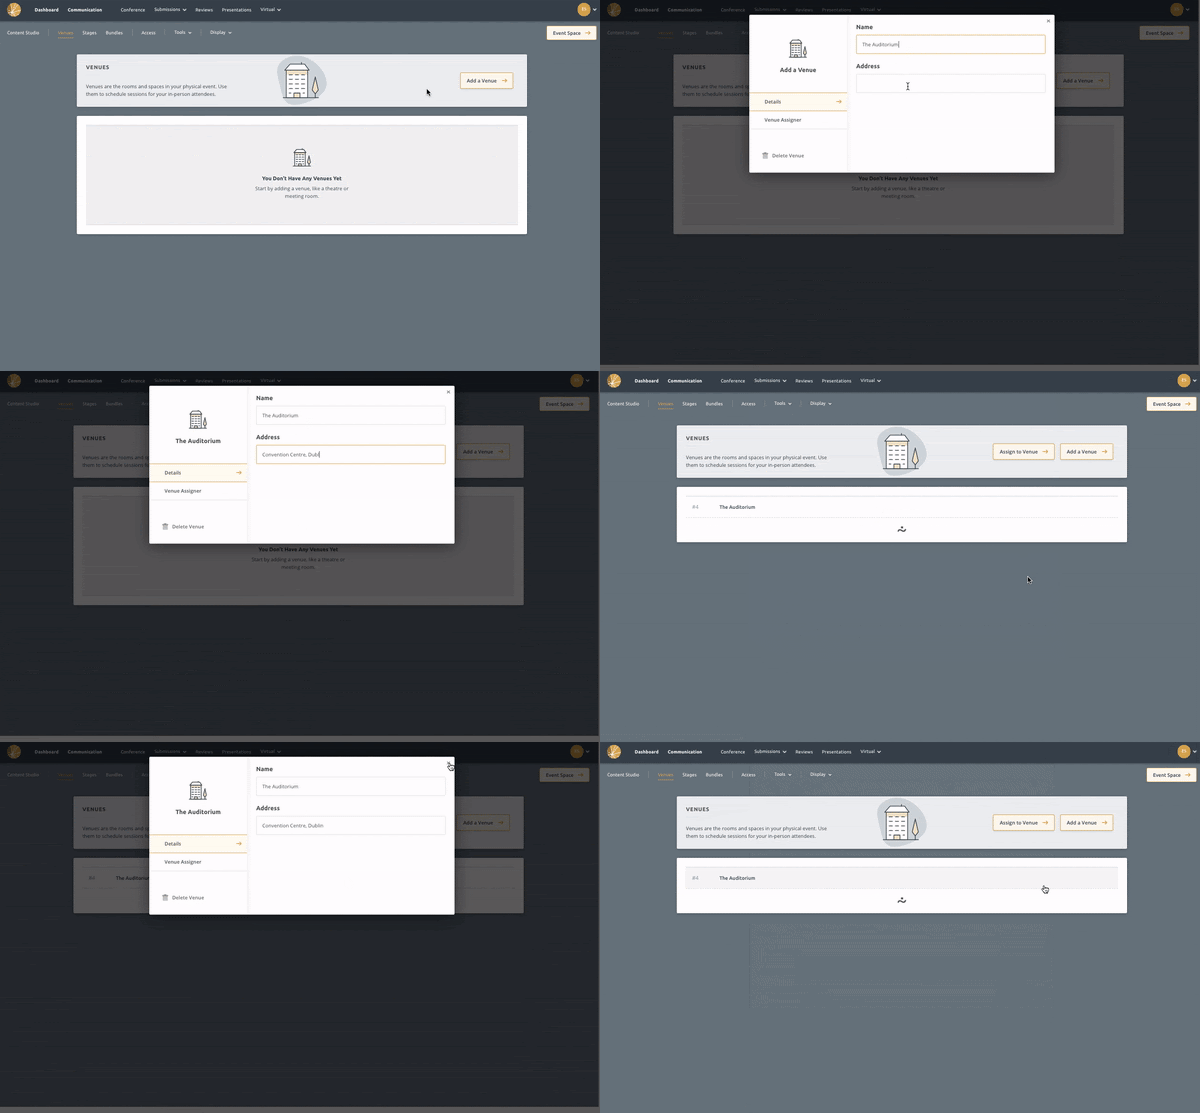
Click on the Add Venue button. You can name the venue and add an address in the pop-up window.

Step 3: That's it! Repeat this process until you have added all venues
It is important to add venues into the system in the order you wish them to appear for delegates. This cannot be changed.
FAQs:
How can I delete a venue or edit a venue name or address?
You can do this by clicking on the name of the venue in the Venues page.

Admins can change the venue details or delete the venue in the pop up window.

The system won't let me delete a venue. Why?
Venues can only be deleted if no sessions are scheduled in them. The system was designed this way to prevent admins form accidentally deleting a venue that may have multiple sessions already assigned. To fully delete a venue, you will first need to remove all sessions assigned to that venue. Once the venue has no sessions in it, you can delete it.
How do I change the order of my venues?
Unfortunately, this is not possible. It is important to add the venues into the system in the order you wish them appear to delegates in the Event Space.
How do I assign sessions to a venue?
For information on how to assign content to a Venue, see this article: Assigning content to a Venue.
