This article goes through they key steps that stage managers may need to complete when starting a virtual meeting.
Step 1: Start the Live Stage
Check out this article for a step by step guide: Starting your Live Stage.
You can start the stage up to 1 hour before the stage is due to go live for attendees to join. We recommend starting the stage early to give you some breathing room to start hosting and prepare for the sessions ahead.
Step 2: Change meeting settings
The conference organisers may have asked you to modify the default meeting settings. Some examples include:
- Enable/Disable Panels: Chat, Q&A, Polling, etc.
- Configure Chat to limit/change attendee messaging privileges (if using Chat)
- Disable Attendee View (if not wanted)
You can change the meeting settings at the start of the stage day or at any point throughout the day. You do not have to close and restart a stage if the settings need to be updated throughout the day.
If a stage is fully closed and reopened later, the settings will revert back to the default. You must modify the settings each time a stage is opened if directed to by the conference admins.
Enable/Disable Panels: Chat, Q&A, Polling, etc.
From the Webex Meetings menu in the upper-right hand corner, select Webinar Options.
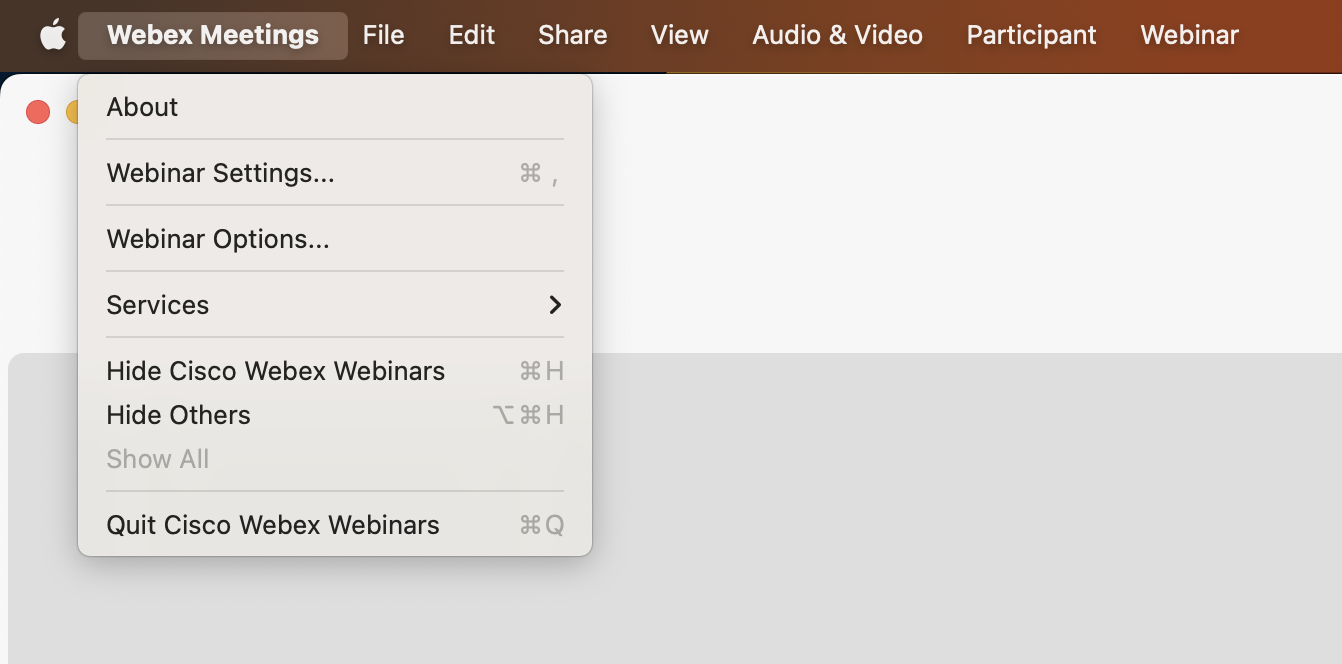
You can enable or disable some panels and features here. Be sure to hit Apply when finished.
There are some additional panel settings in the View menu > Panels > Manage Panels.
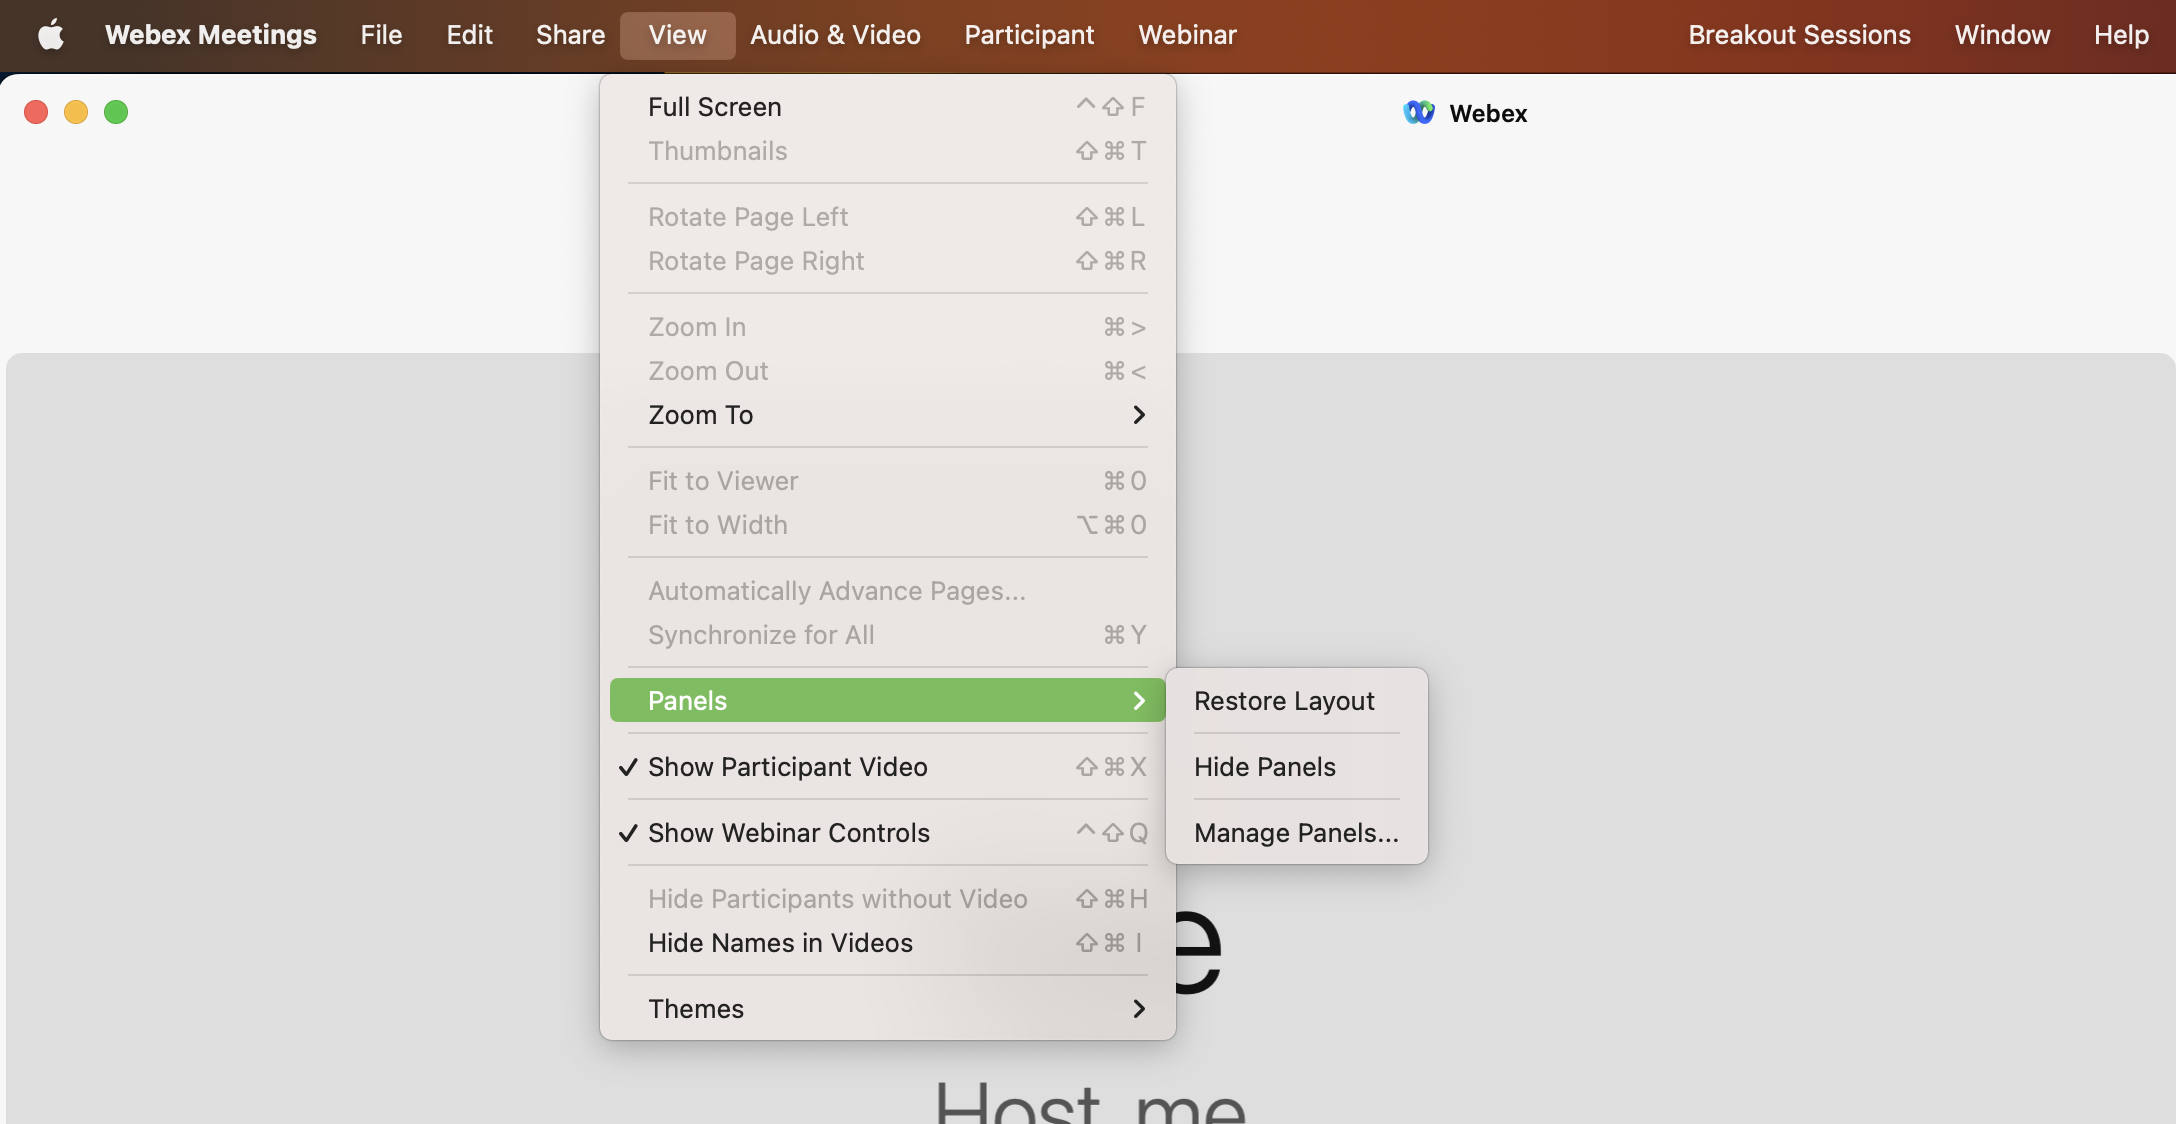
You can remove/add panels here; or move the positioning of the panels. Be sure to hit OK to save the changes.
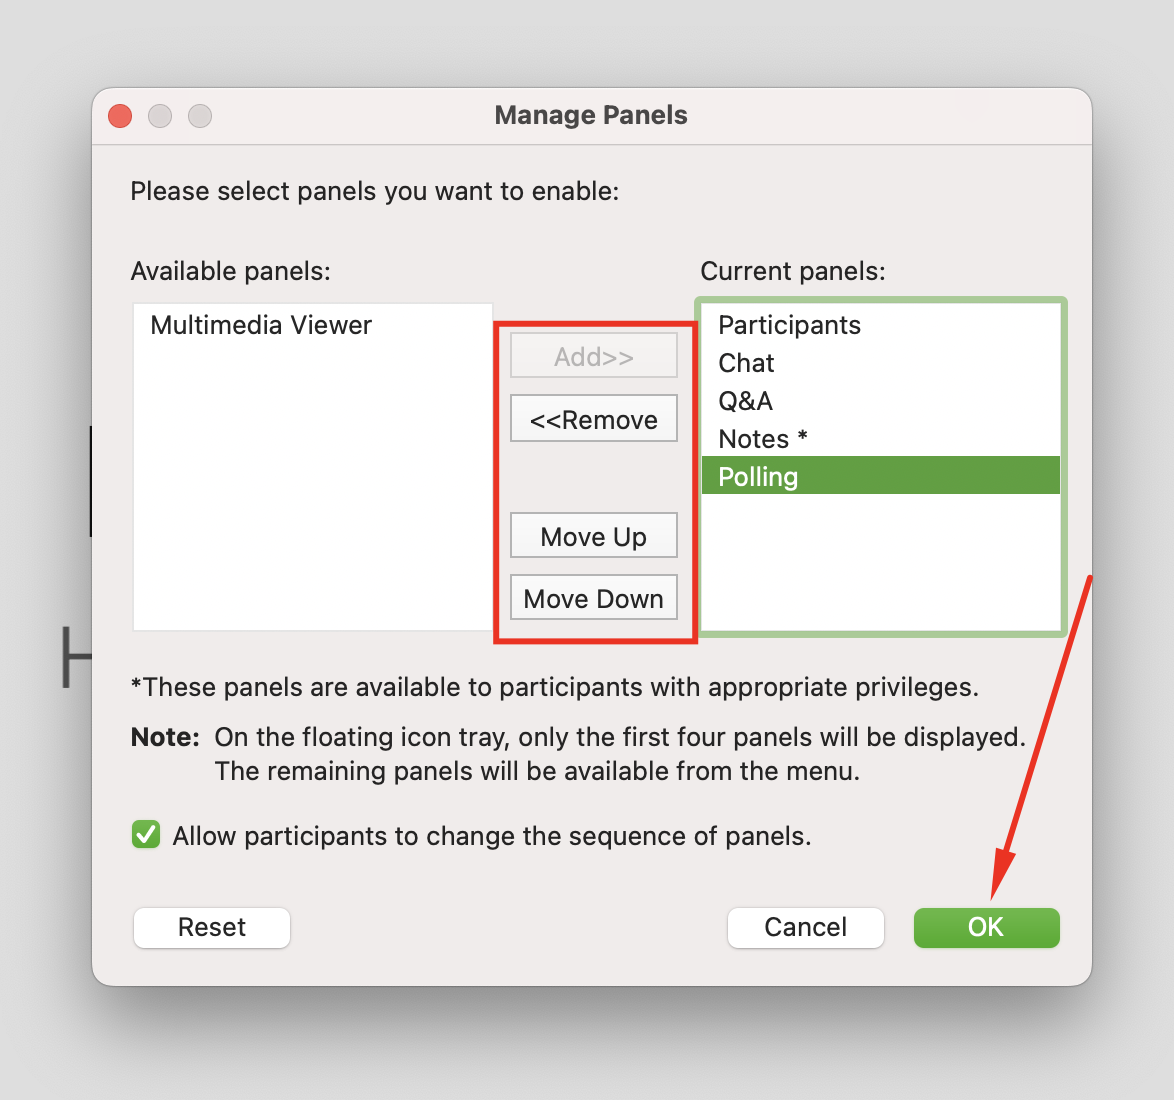
Modifying communication privileges
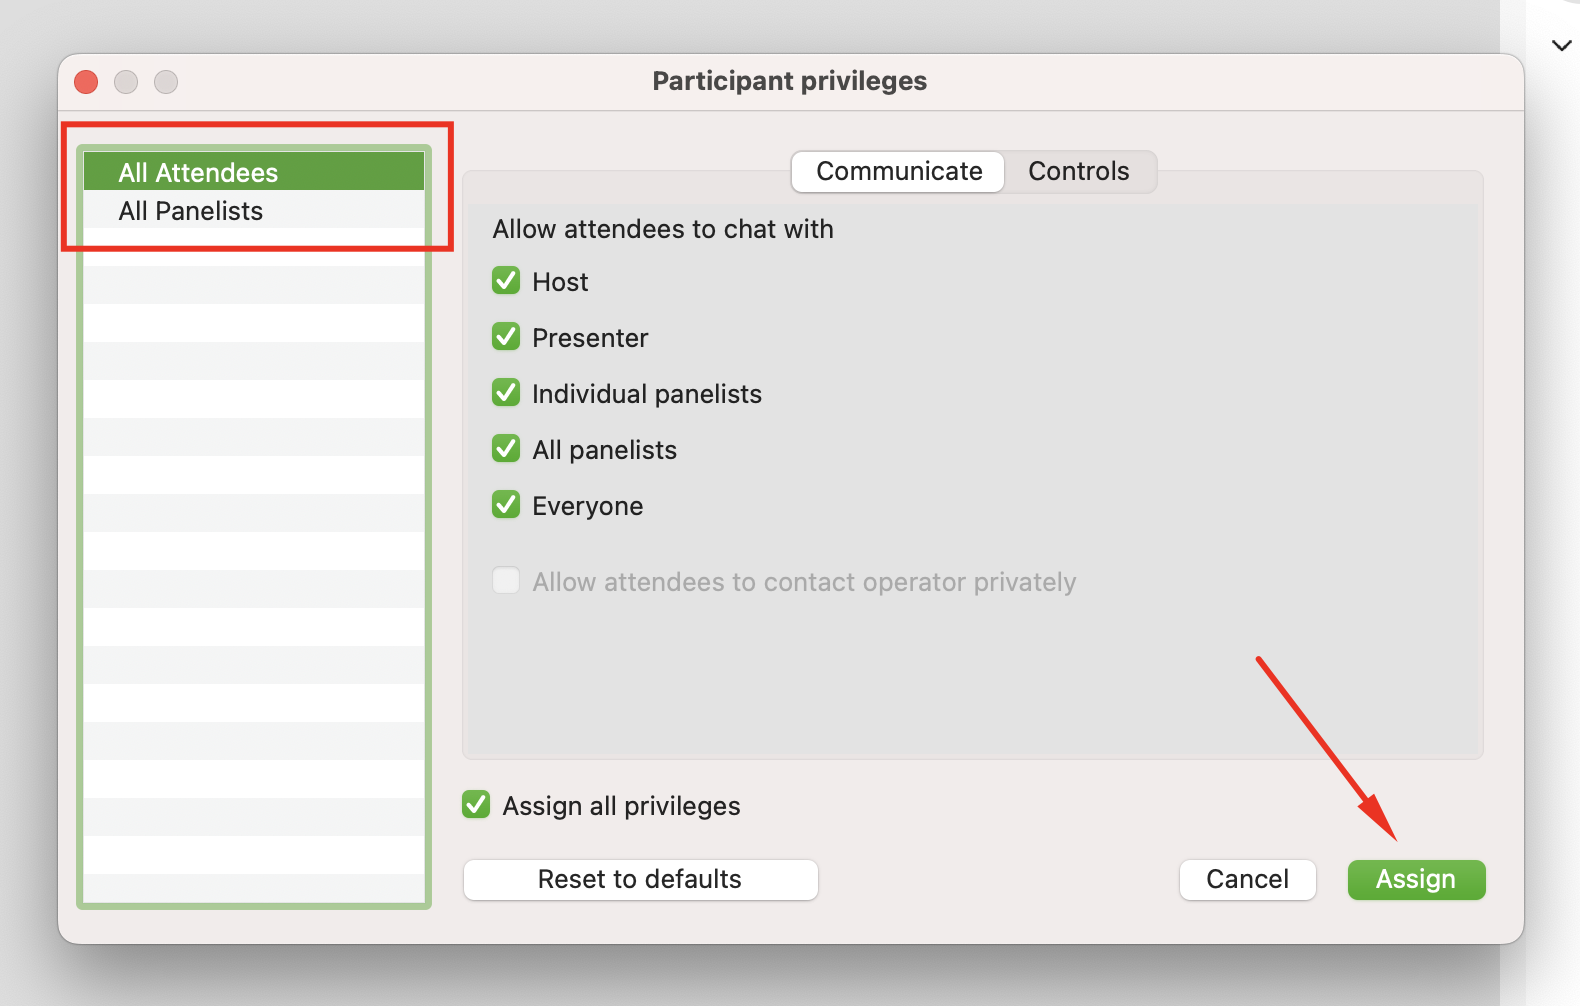
Communication privileges can be managed in the Participant menu > Assign Privileges.
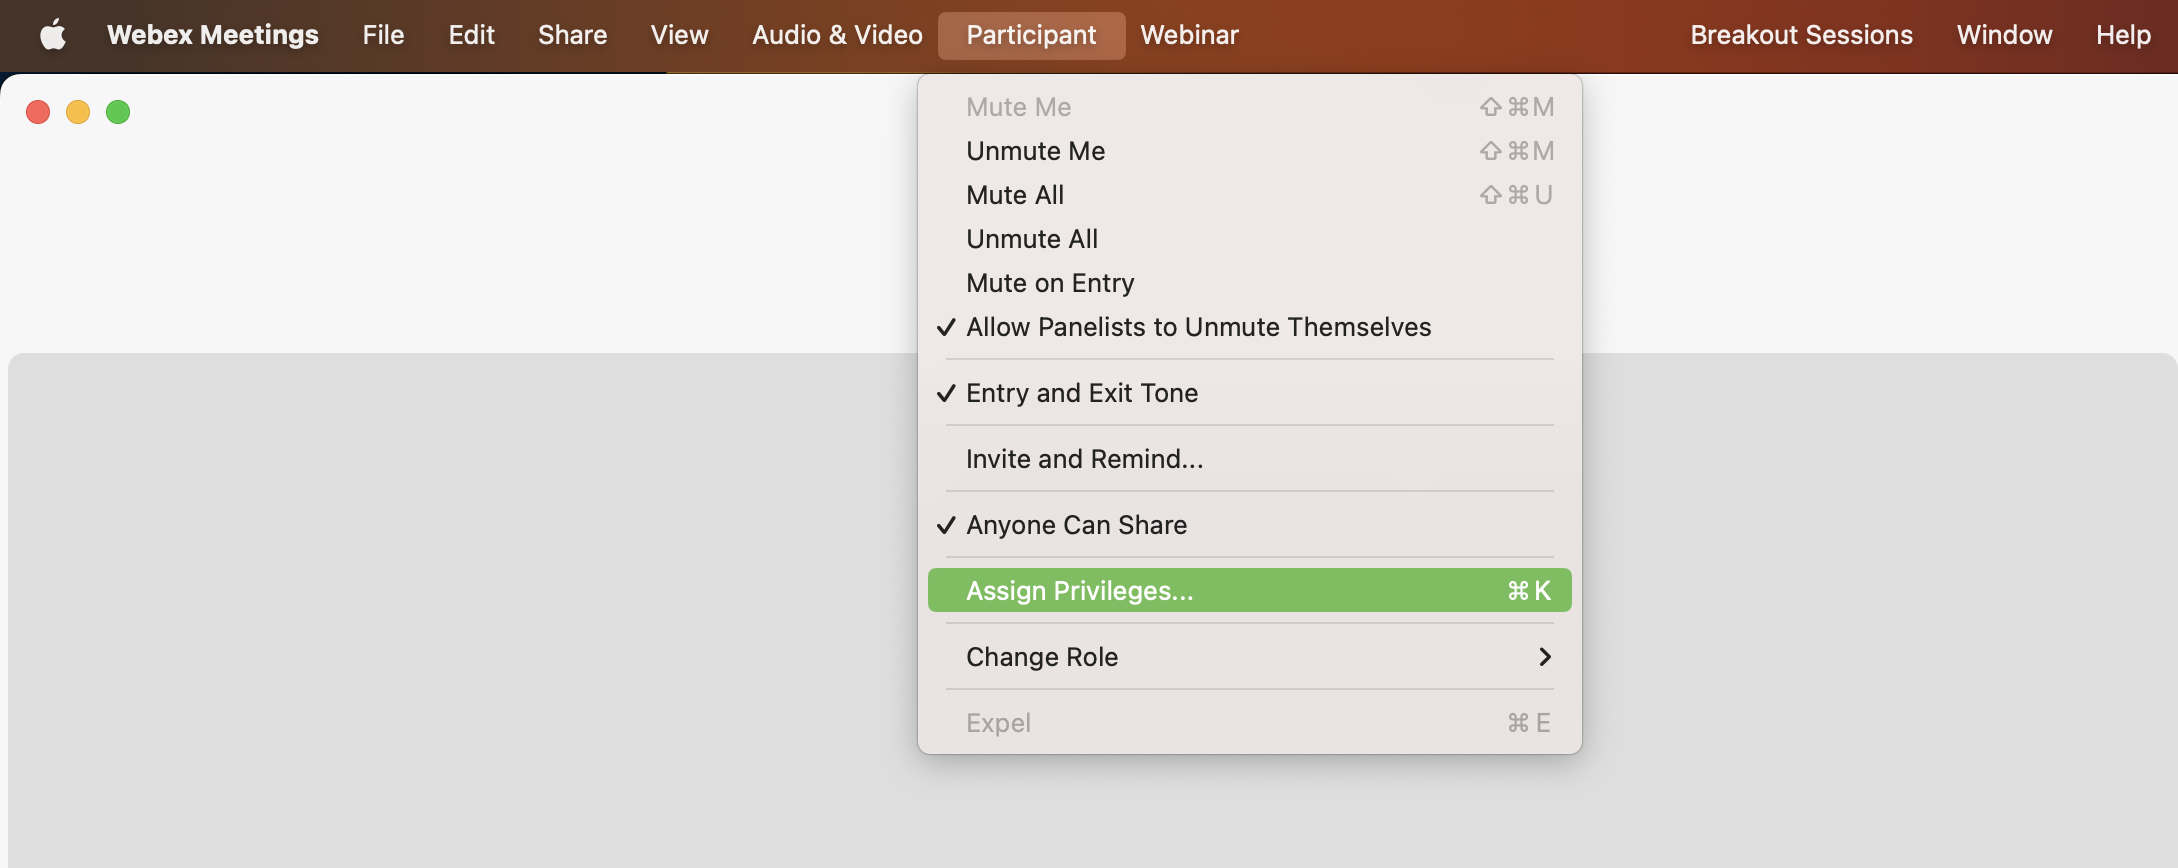
You can then modify who attendees and panelists can chat with. By default all attendees can chat with whomever they would like but this can be limited to only the host, for example. The conference organisers will let you know if you need to change these settings. Be sure to hit Assign when a change is made.
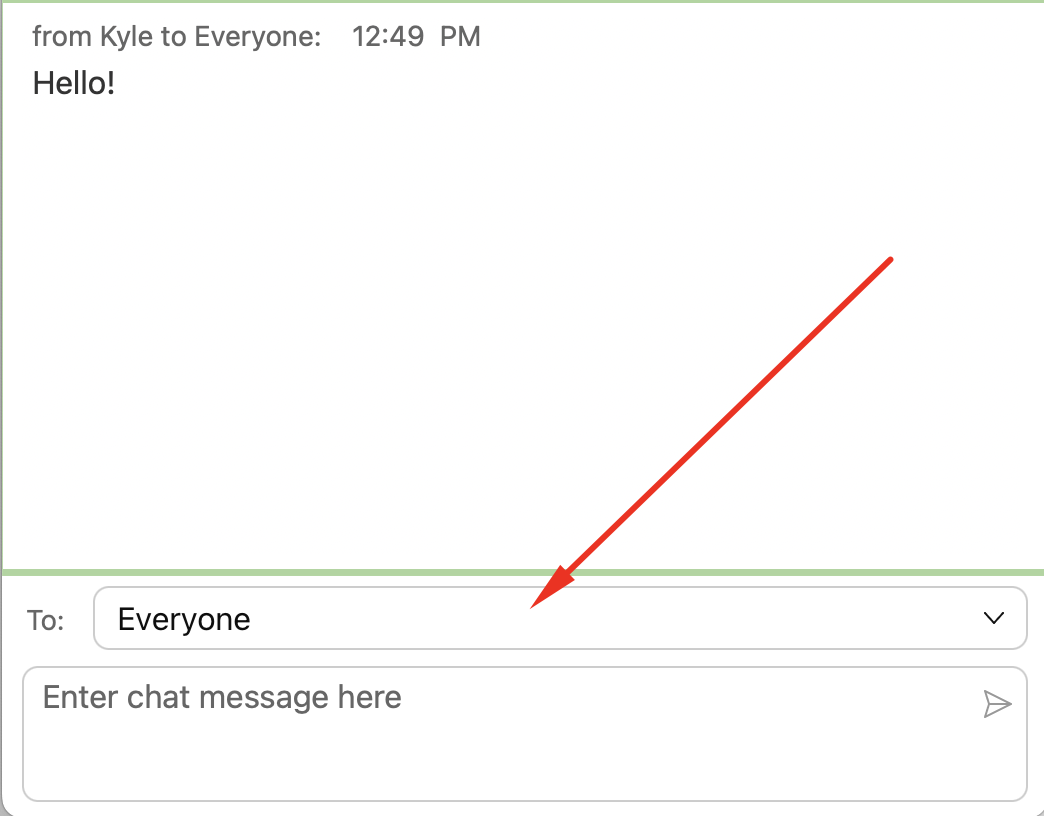
You can instruct participants to choose a specific group or person to chat with through the drop-down menu. The options they will have depend on the above settings.
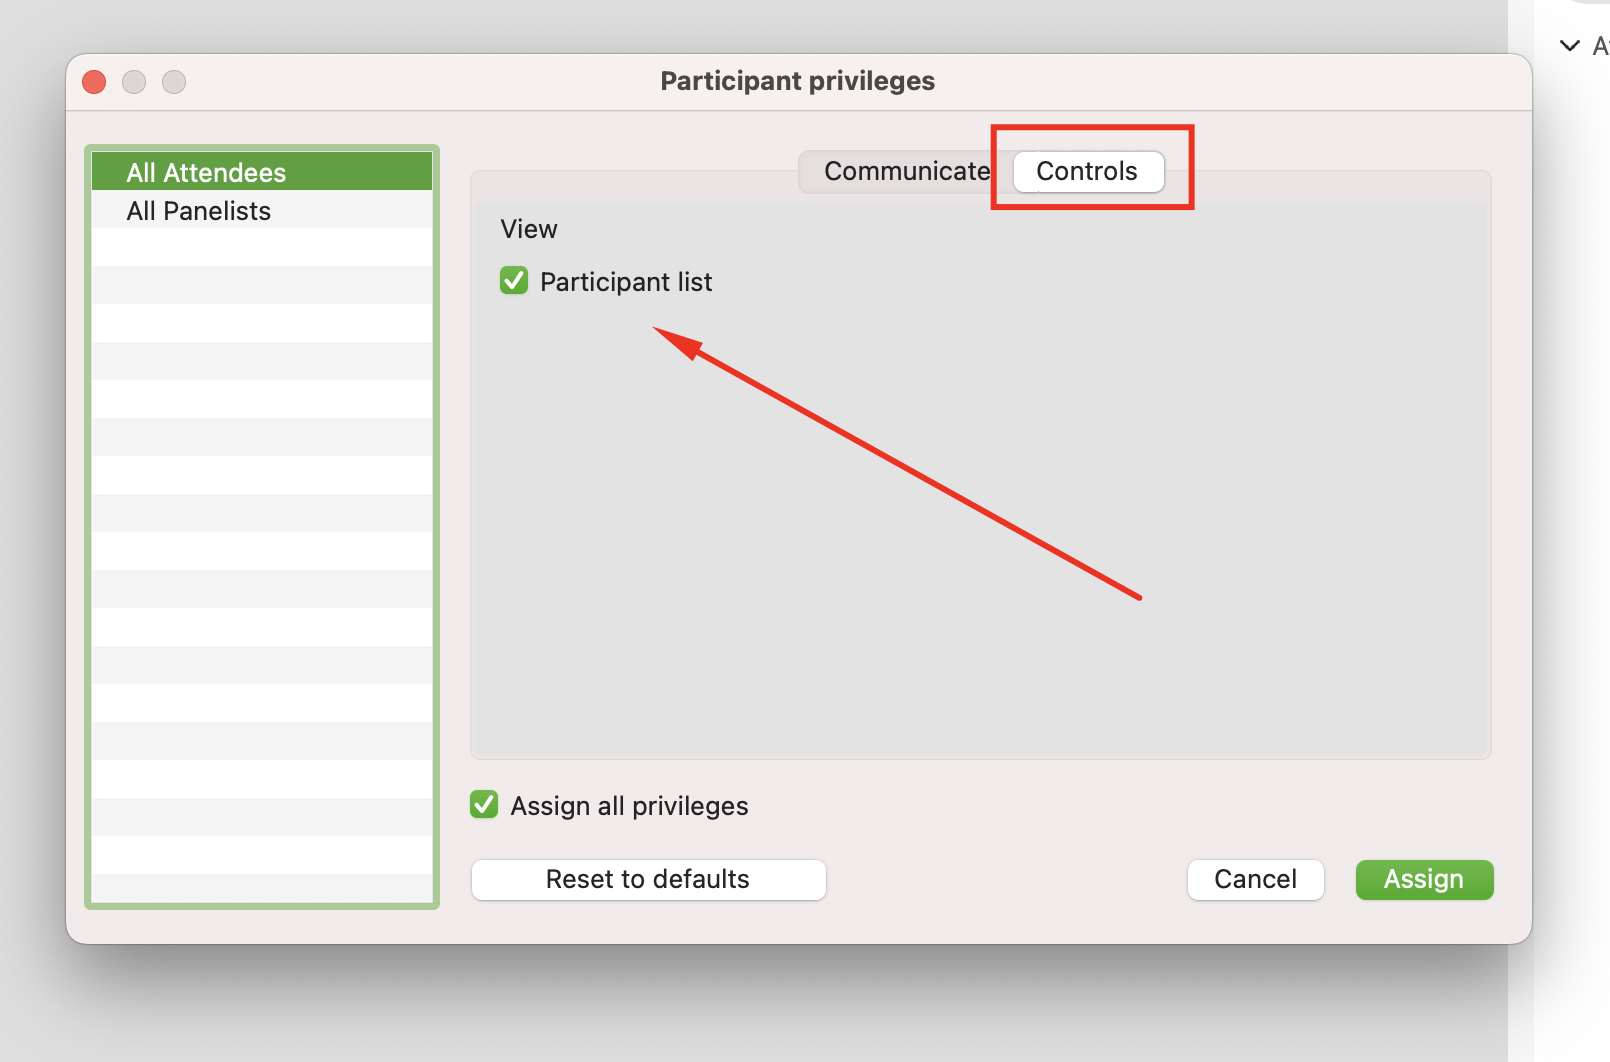
Disable Attendee View (if not wanted)
By default, all attendees can see the display names of everyone else in the meeting room. This can be limited in the Participant menu > Assign Privileges > Controls tab. Be sure to hit Assign to save the change.
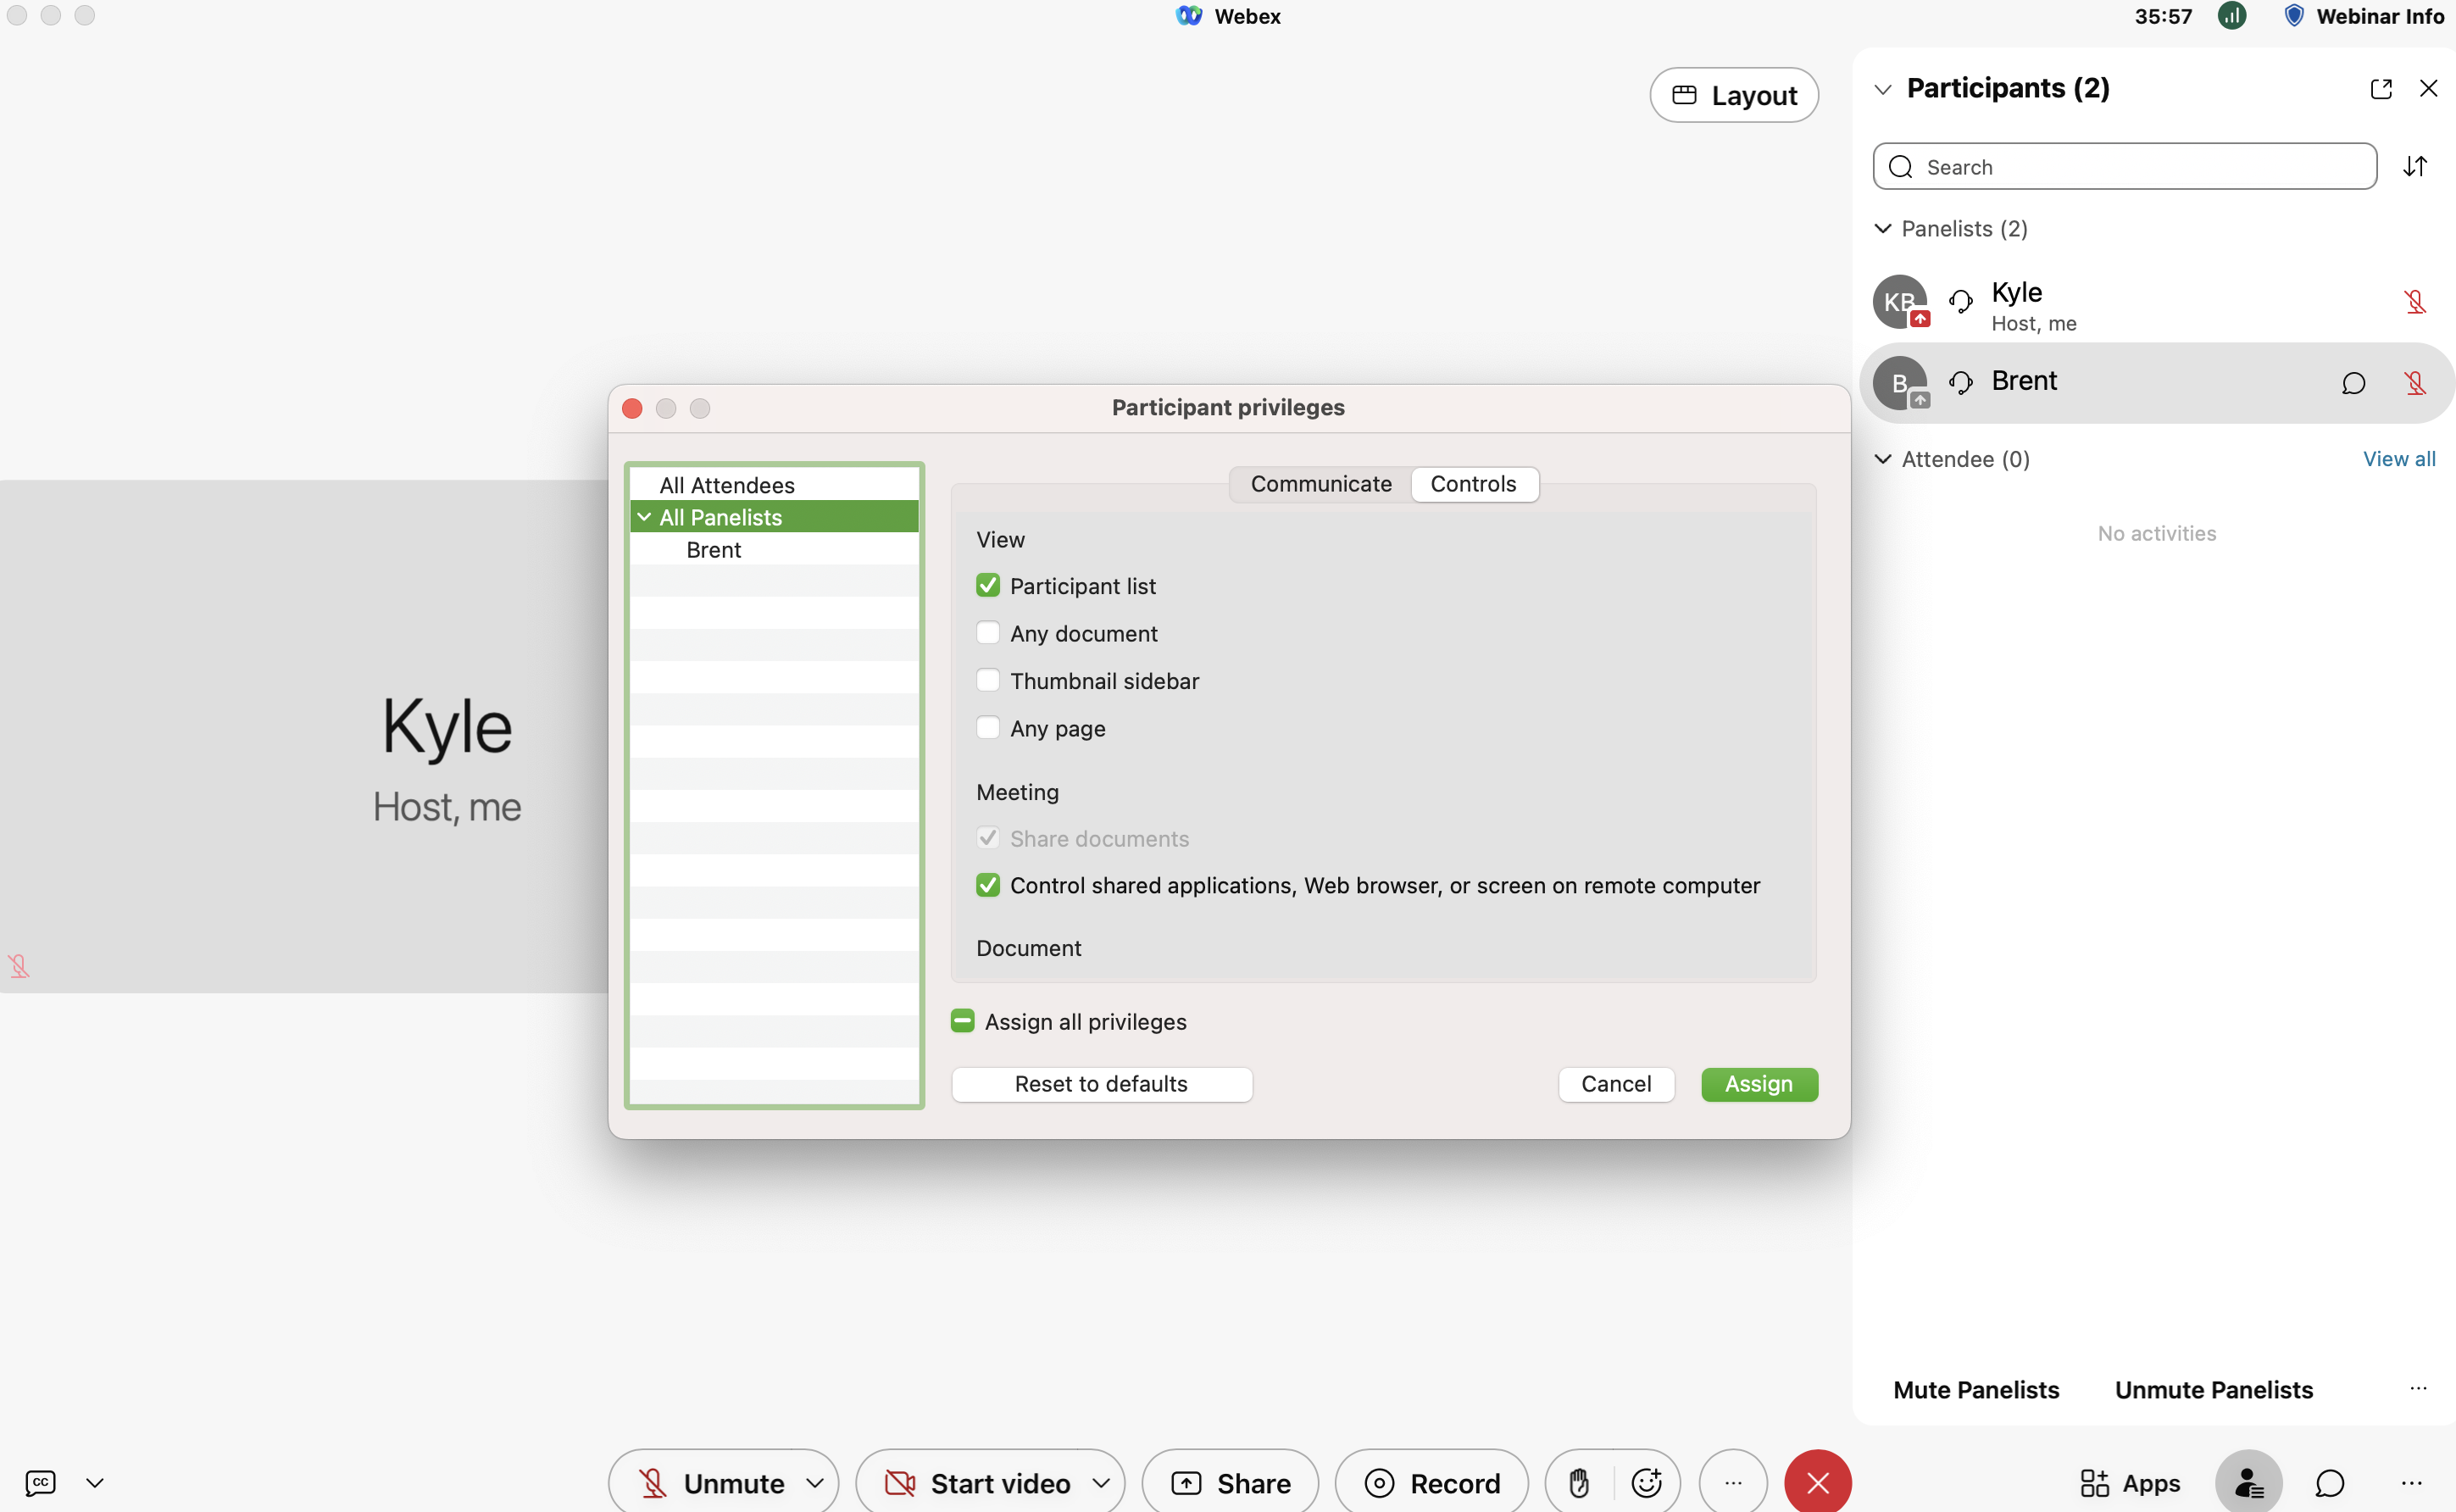
Limit control permissions for panelists
You can also limit views and permissions for all panelists and individual panelists, if needed.
Limit screen sharing abilities
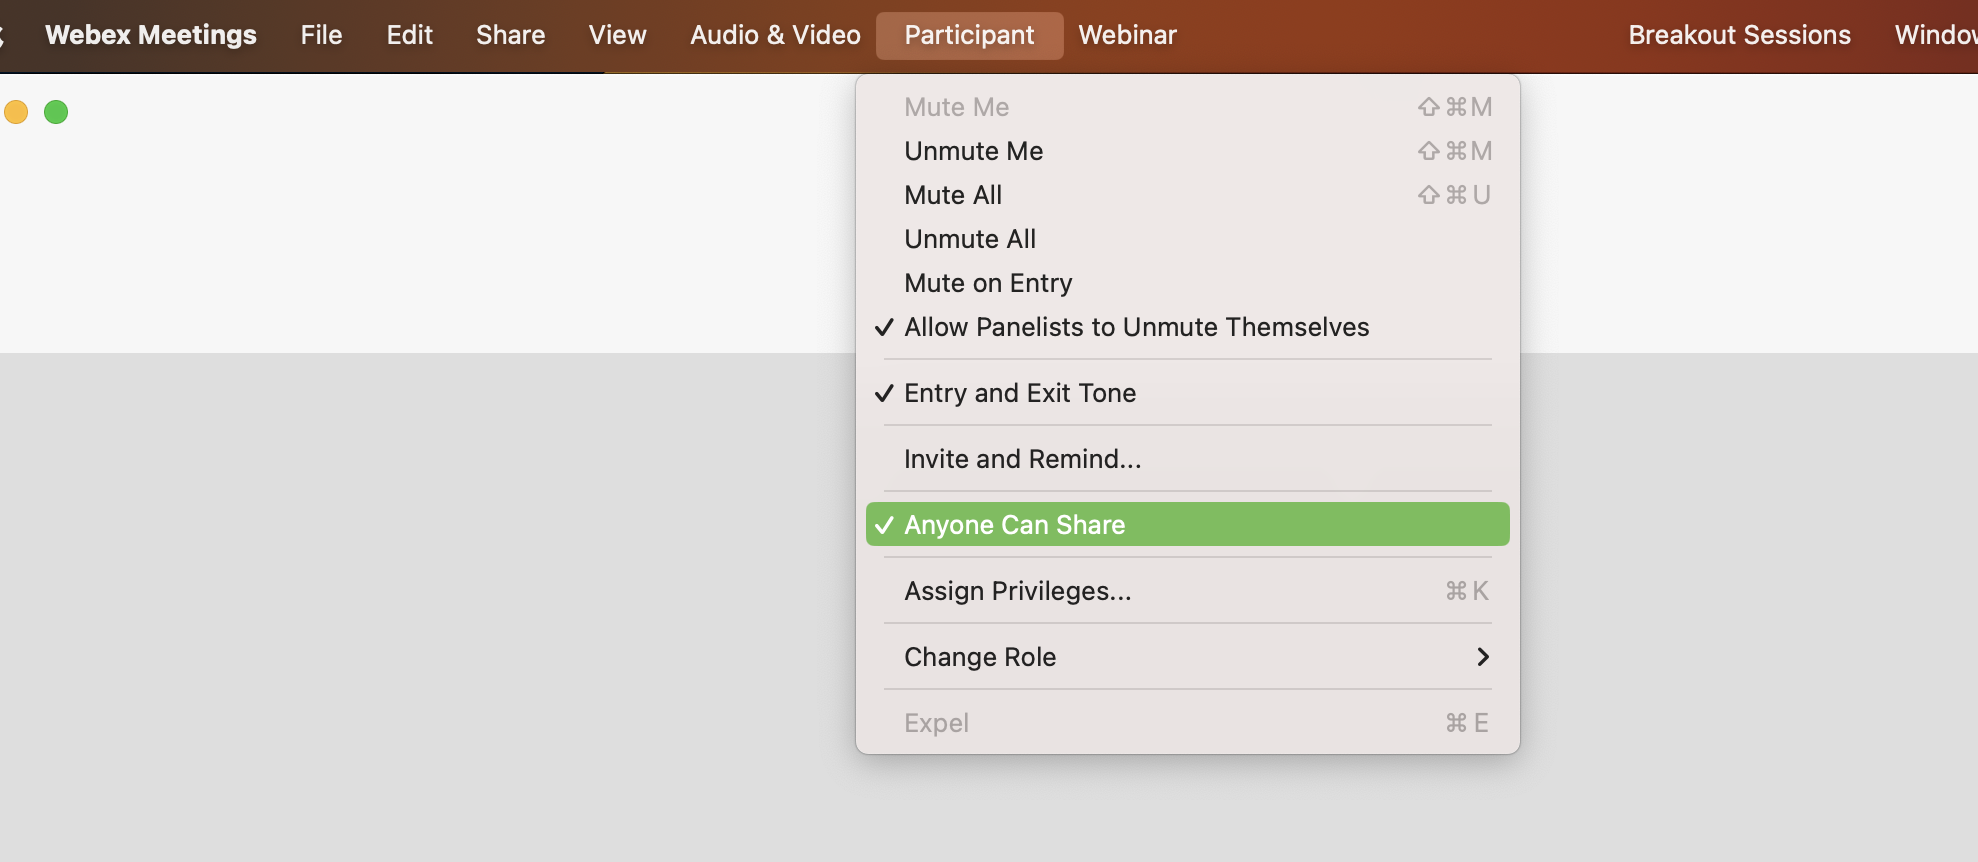
By default, any panelist can begin screen sharing at any time. This means that a panelist could accidentally 'steal' the screen sharing role from a presenter. We highly recommend unchecking the Anyone Can Share option in the Participant menu each time a meeting room is opened.
Step 4: Start a Practice Session (if using)
You can open your 'virtual green room' and promote speakers to panelist so they can test their equipment and chat privately away from other attendees. Check out this article for more details: Practice sessions: Your Virtual Green Room
