The video below covers this process in detail. You can check it out on Vimeo here.
Opening the review:
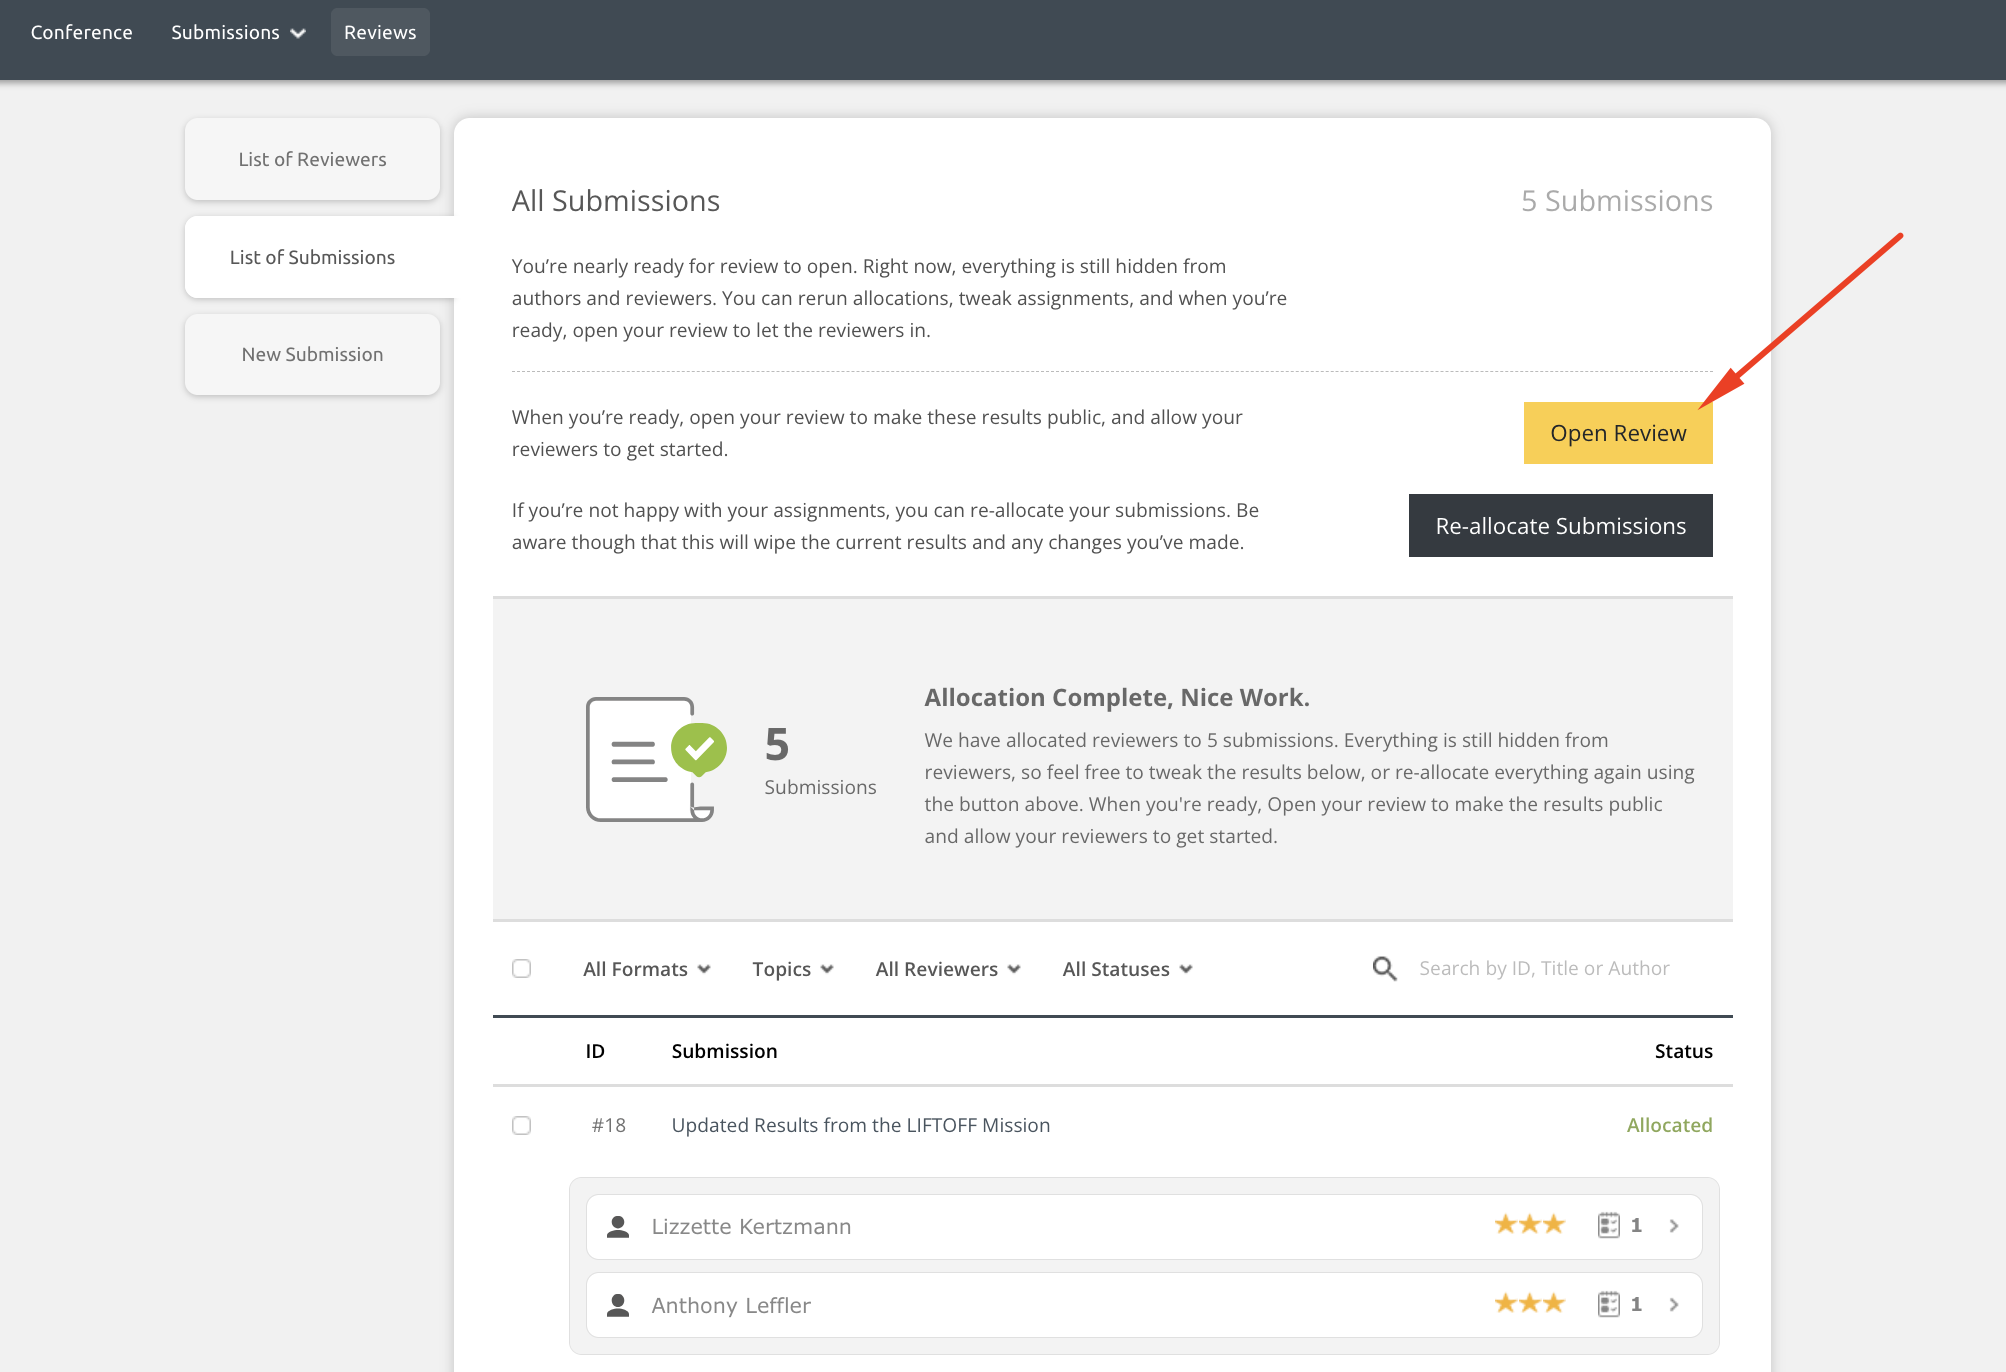
Once you are happy with the review assignments, you can open the review. Haven't allocated yet? Check out this article first.
- Go to the Reviews hub
- Ensure you are viewing the List of Submissions
- Locate the Open Review button
IMPORTANT! If you are a chair on multiple tracks and are allocating track by track, please ensure you are looking at the correct track before taking this action.
- Choose one of the following options in the pop-up:
- Open Only - the review will open, but no emails will go to reviewers. You may need to email them separately so they know it's time to get started. Once you confirm this choice, your review will be open.
- Email & Open - you will be brought into the communication hub and can follow the prompts to send assignments to reviewers. Once that email is sent, your review is open.
- No, Cancel - the review will not be opened yet. You can come back and open it at another time.
- Now it's time to manage your review. Be sure to check out the video above!
Skipping the review to assign decisions:
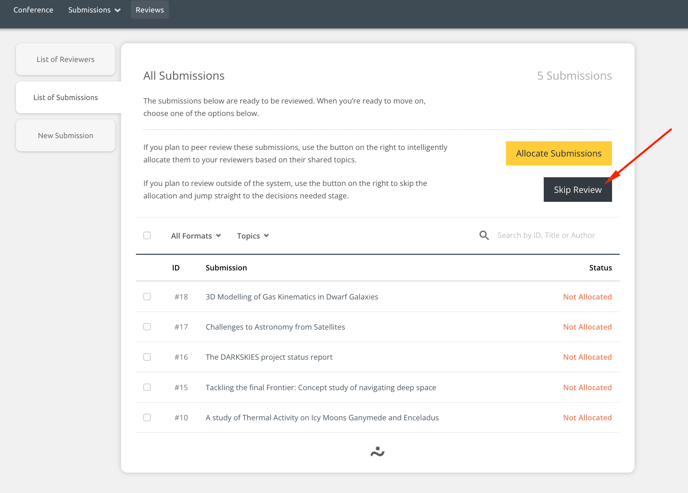
You may not need any reviewers to give you their opinion on all submissions, or on a specific track. You can skip the review on all submissions or on a specific track by:
- Go to the Reviews hub
- Ensure you are viewing the List of Submissions
- Locate the Skip Review button
IMPORTANT! If you are a chair on multiple tracks and are allocating track by track, please ensure you are looking at the correct track before taking this action.
- Click on the Skip Review button. You will see a pop-up with information about this action. Click Yes, Skip Review to continue or No, Cancel if you are not ready.
- Your track will be pushed into review. All submissions will appear in the Decisions Needed state, and you can apply decisions.
Hiding the review:
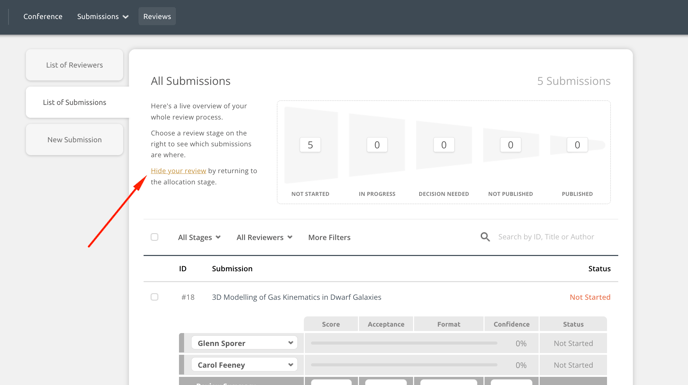
You may need to pause the review process. Hiding the review will prevent reviewers from seeing their assignments or continuing with their work. This is useful if you opened the review by accident and you don't want your reviewers to start the review just yet.
The review can be hidden before reviewers complete their reviews only. If one or more reviews have been completed, you cannot hide the review.
- Go to the Reviews hub
- Ensure you are viewing the List of Submissions
- Locate the Hide Review button
IMPORTANT! If you have tracks enabled and are allocating track by track, please ensure you are looking at the correct track before taking this action.
- Choose one of the following in the pop-up:
- Hide Review - to bring your review back into the allocation stage, meaning reviewers cannot continue working. You can open it again later.
- No, cancel - to keep your review open
- You can then follow the steps above to open the review again.
