There are 4 main steps to be completed before you can Allocate submissions to Reviewers:
1. Complete the Configure Review menu (must be completed before you can set up your marking scheme)
2. Complete the Setup Marking Scheme menu - details in this article!
3. Complete the Configure Acceptance menu
4. Add Reviewers and either assign topics to them or invite them to pick their own topics
If it is time to create the reviewer form, you are in the right place! Locate the Setup Review dashboard card and click on Configure Marking Scheme Settings.

Step 1: Scoring Categories
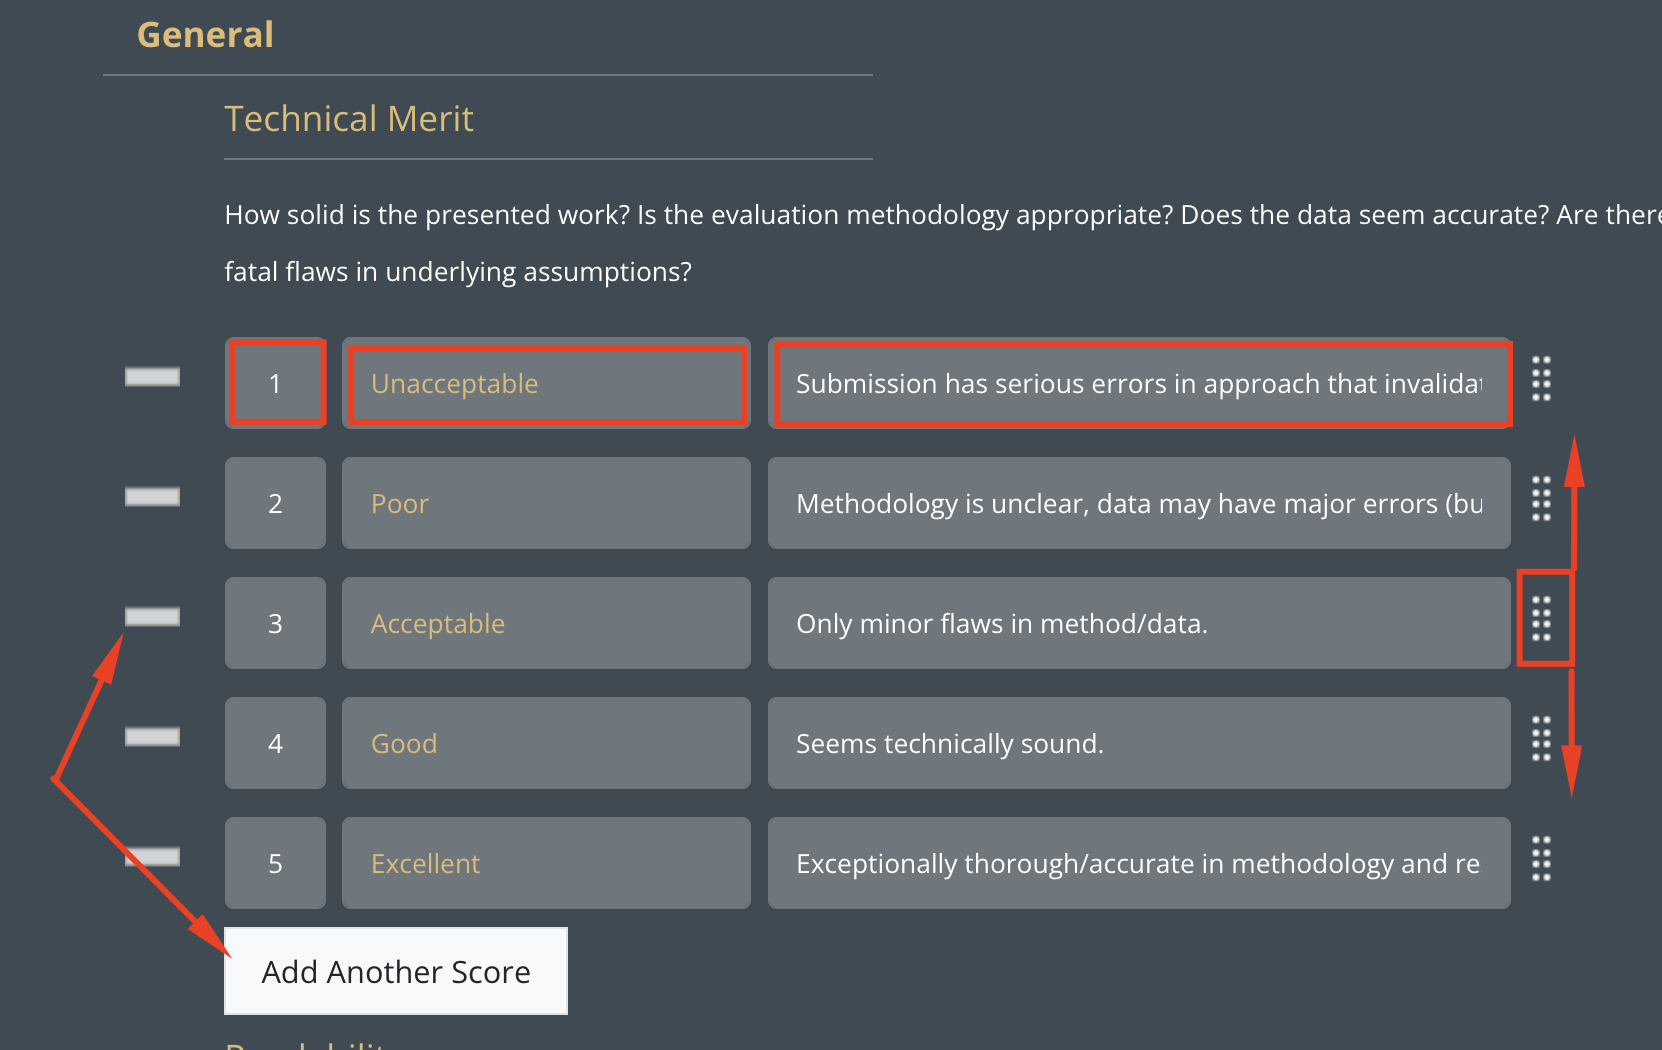
Step 1 is where you will create questions for reviewers. Don't worry about the answers quite yet! That's step 2.
Be sure to check out this article with ideas for your marking scheme. Now, let's go through the technical stuff. You can:
- Remove the check from the left-hand side of a question to remove it from your reviewer form. Reviewers will not see questions that aren't checked.
- Reorder questions by dragging them up and down using the dots to the right-hand side of a question
- Change the question name and description box to match your review needs.

You can add new questions by clicking into a placeholder question field, which appears a little lower on this tab.

The first section of questions under the General section is your scoring grade questions. The answers to these will be numerical (e.g., 1-5)

Scroll down and locate the Other question section. This is where you can add in new drop-down style questions. You'll add the options reviewers can select from on step 2.

You'll find 3 questions at the bottom of list which are enabled by default. You can edit the explainer text in these questions; or disable them completely.
- Format: asks reviewers to recommend an acceptance format. This is not a decision, only a recommendation. Admins will make the final decisions.
- Acceptance: asks reviewers to rank how strongly they would accept this work
- Confidence: asks reviewers how confident they are in the subject matter. If they indicate they are not confident, perhaps you'd want to add another reviewer to double check the content before making a decision.
Hit Done at the bottom of this tab to head to the next step when ready!

Step 2: Scoring Grades
This is where you can modify the responses reviewers will choose to the questions you ask. You will be able to:
- add or remove scoring grades
- change the number, label or help text
- move responses up or down in the list
That's it! Click Done to head to the next step.
Step 3: Category Weighting
Category weighting is disabled by default. If enabled, you can change how the general review score is calculated. This helps you weight certain scoring grade questions as more important than others. For example, perhaps technical merit is the most important aspect for your conference. You can make this category twice as important in the general score calculation by using category weighting.

Click Done to head to the next step when ready!
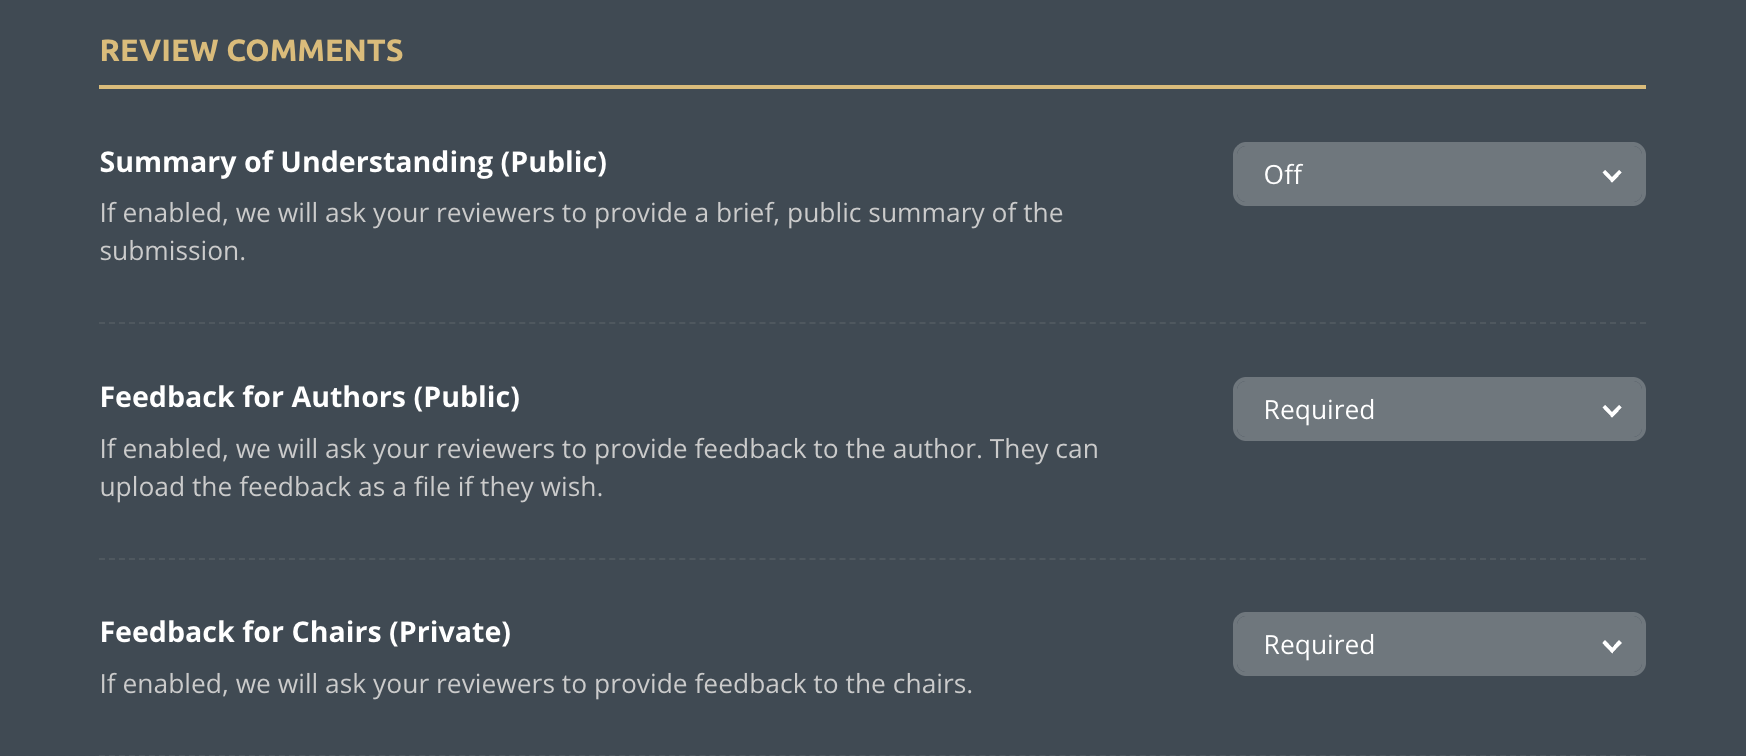
Step 4: Extra Settings
There are few options on this step that you can use:
- Summary of understanding: this would require reviewers to write a summary of the content. Authors would see this summary when you publish decisions.
- Feedback for authors: you could either require or allow reviewers to leave comments that would be visible to authors when you publish decisions.
- Feedback for chairs: you could either require or allow reviewers to leave comments for chairs only. Authors will never see this comments.
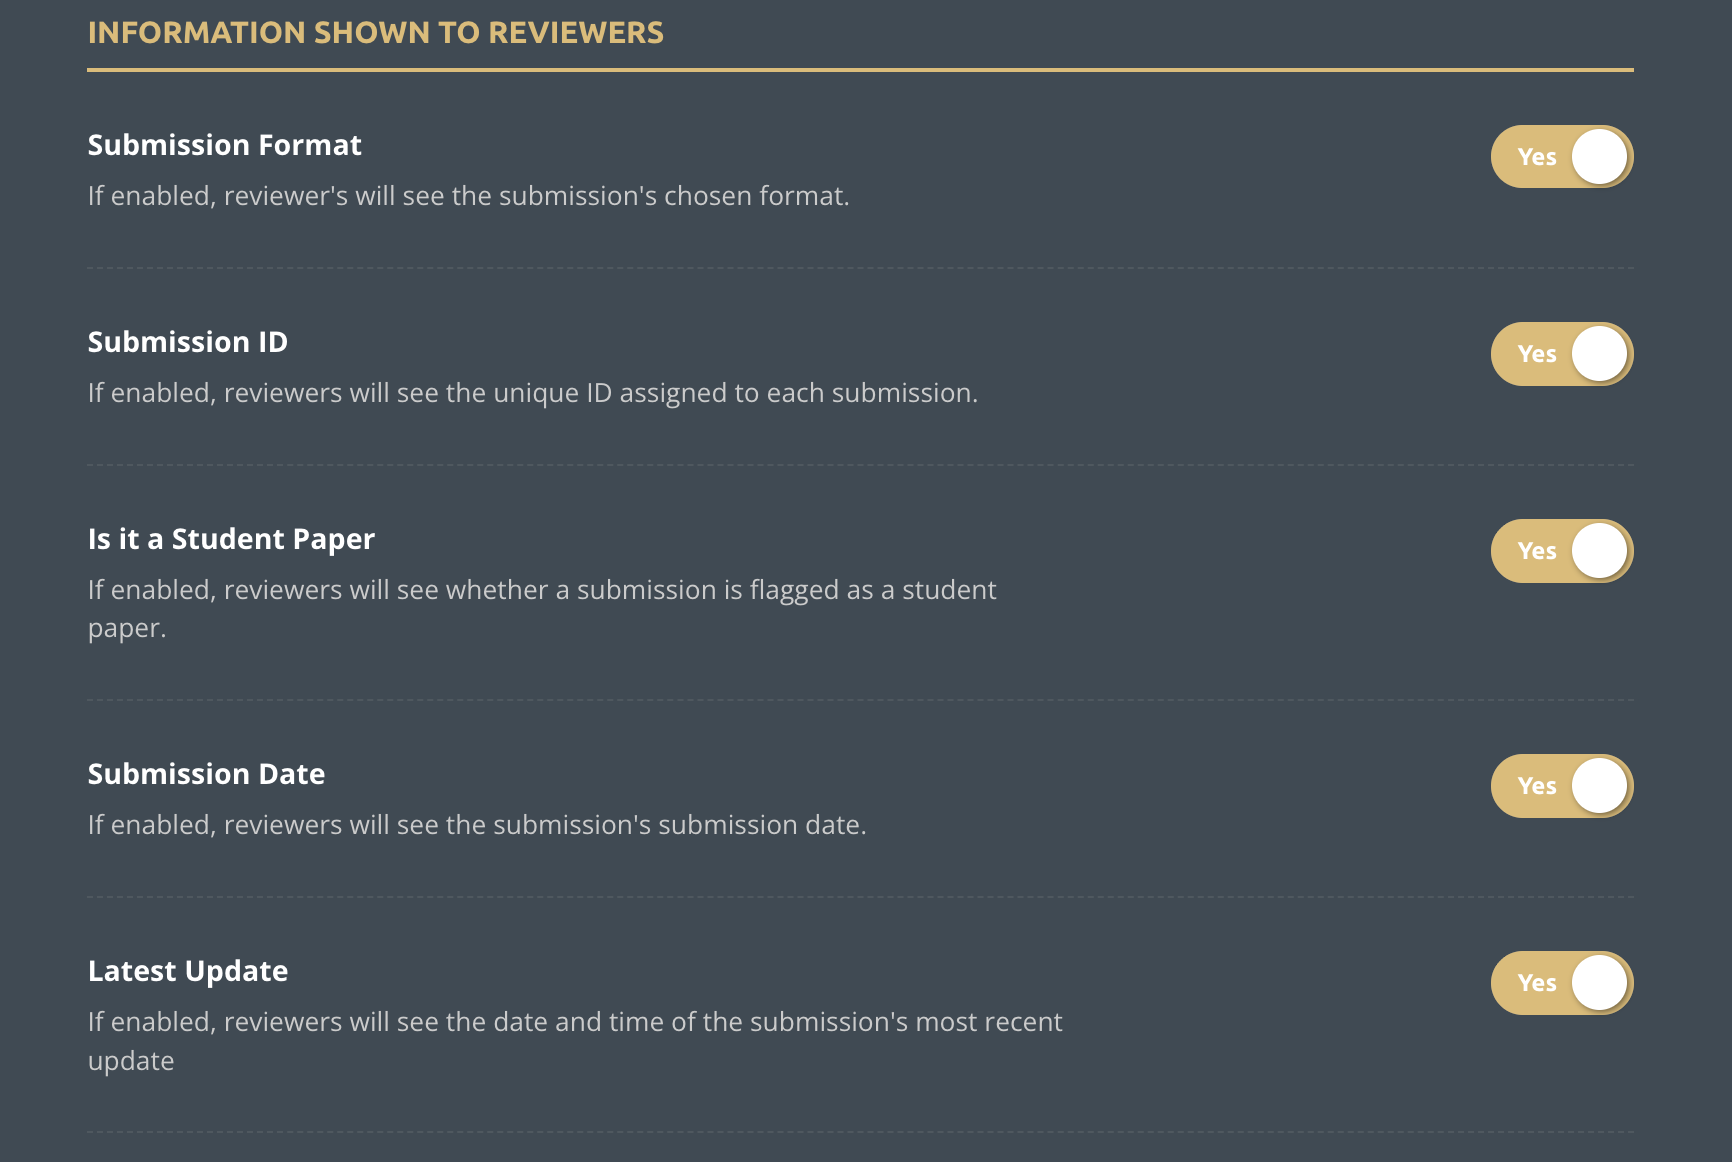
You can also choose which information reviewers will see when viewing a submission.
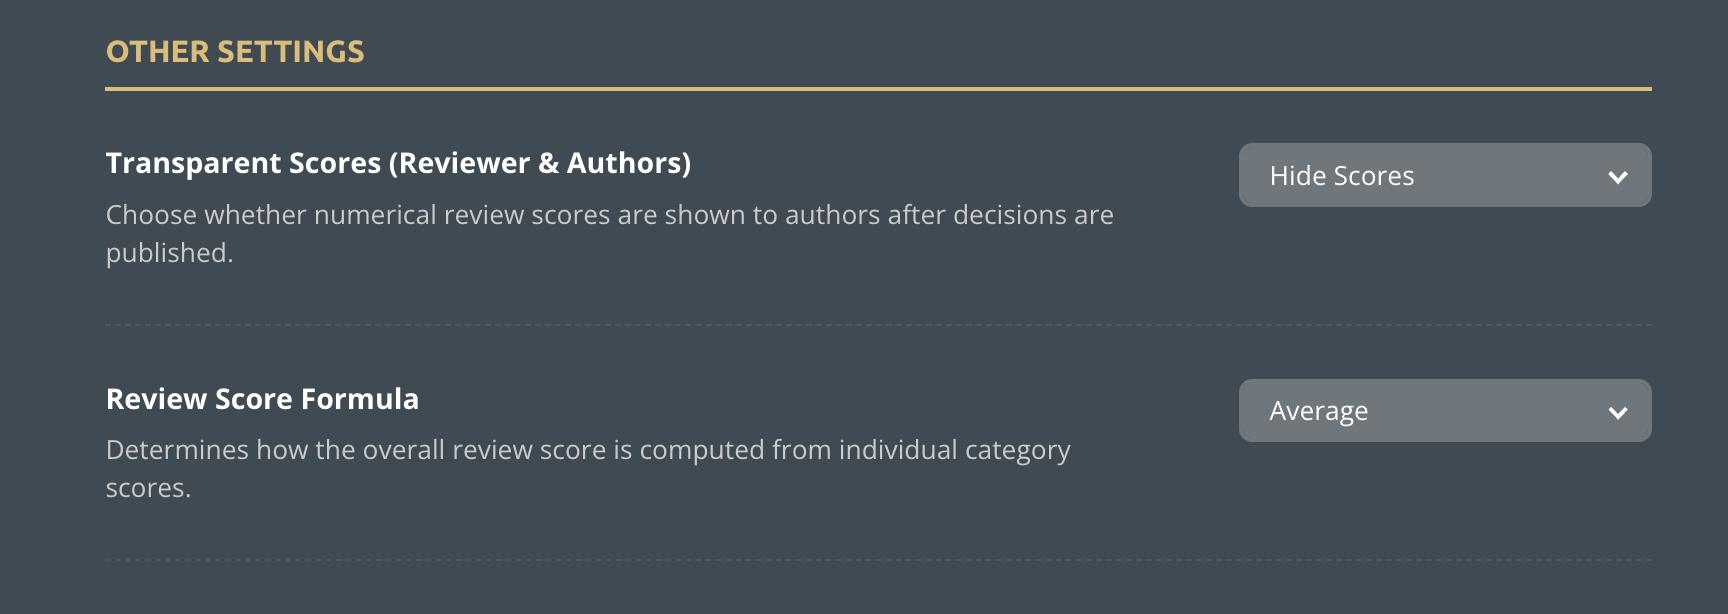
There are two final settings to consider:
- Transparent Scores: You can choose to show authors the numerical scores they received, or hide them.
- Review Score formula: You can choose to see the over all review score as an average or sum of all scores left by reviewers.
Click Done to head to the next step when ready!
Step 5: Preview
The time has finally arrived! You can now preview your marking scheme. We recommend carefully reviewing the form and making adjustments until you are happy!
You cannot edit the reviewer form after the review has started. Please carefully preview your form and make edits before opening the review.
Click Edit to check out your questions.

That's it! When you hit Done, you will be back on your dashboard. You can grab a cup of tea or head into the final review menu: Configure Acceptance.